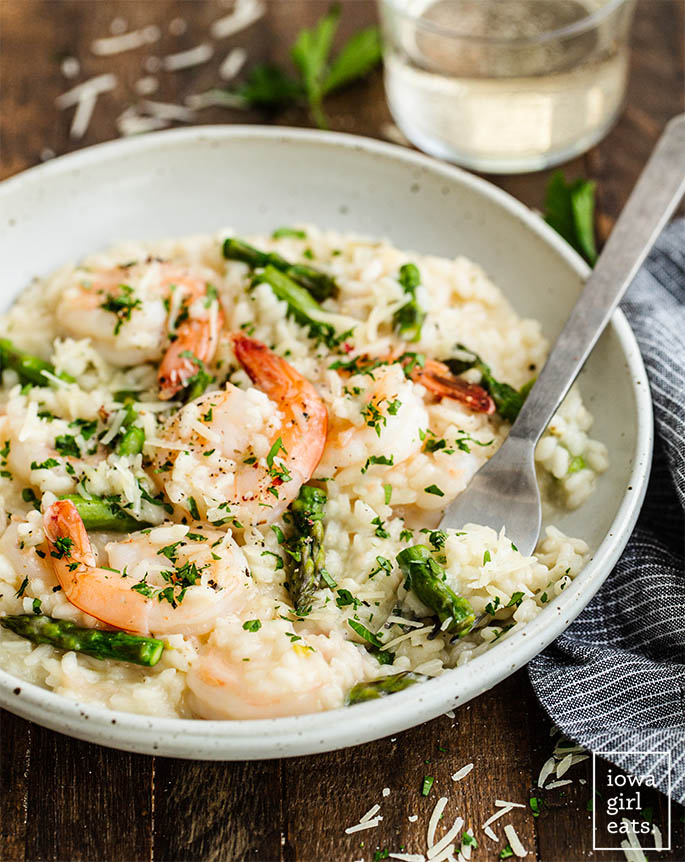
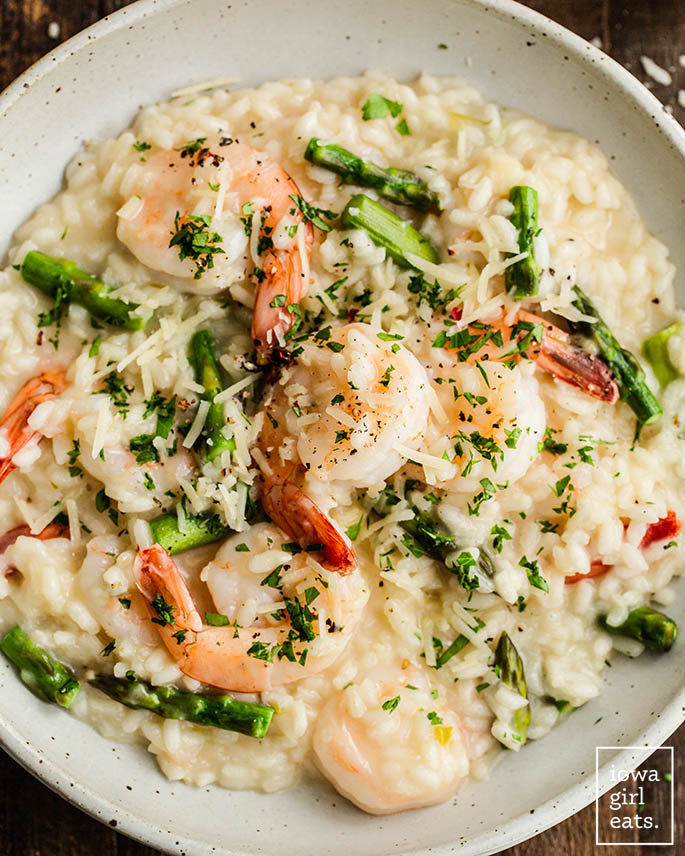
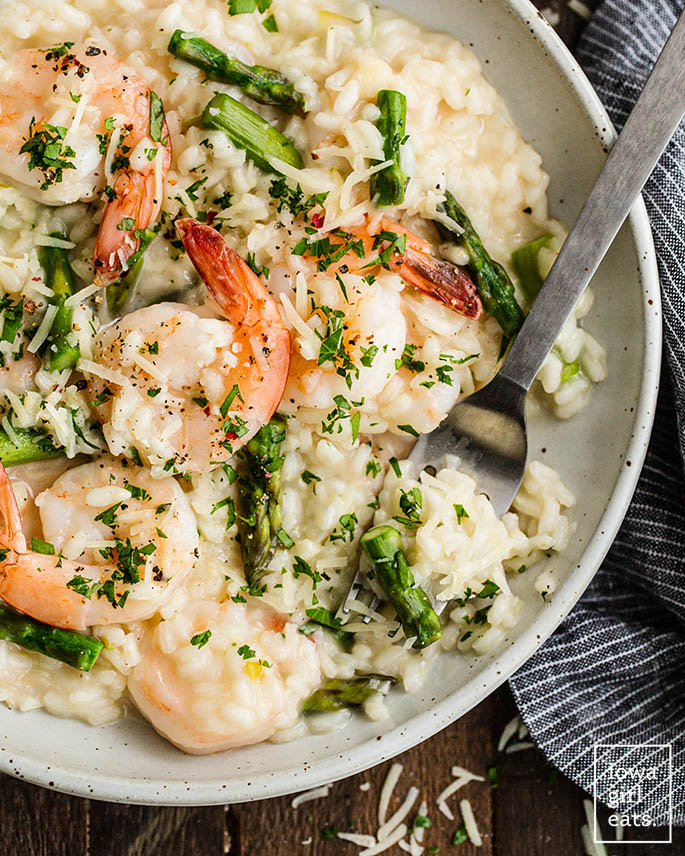
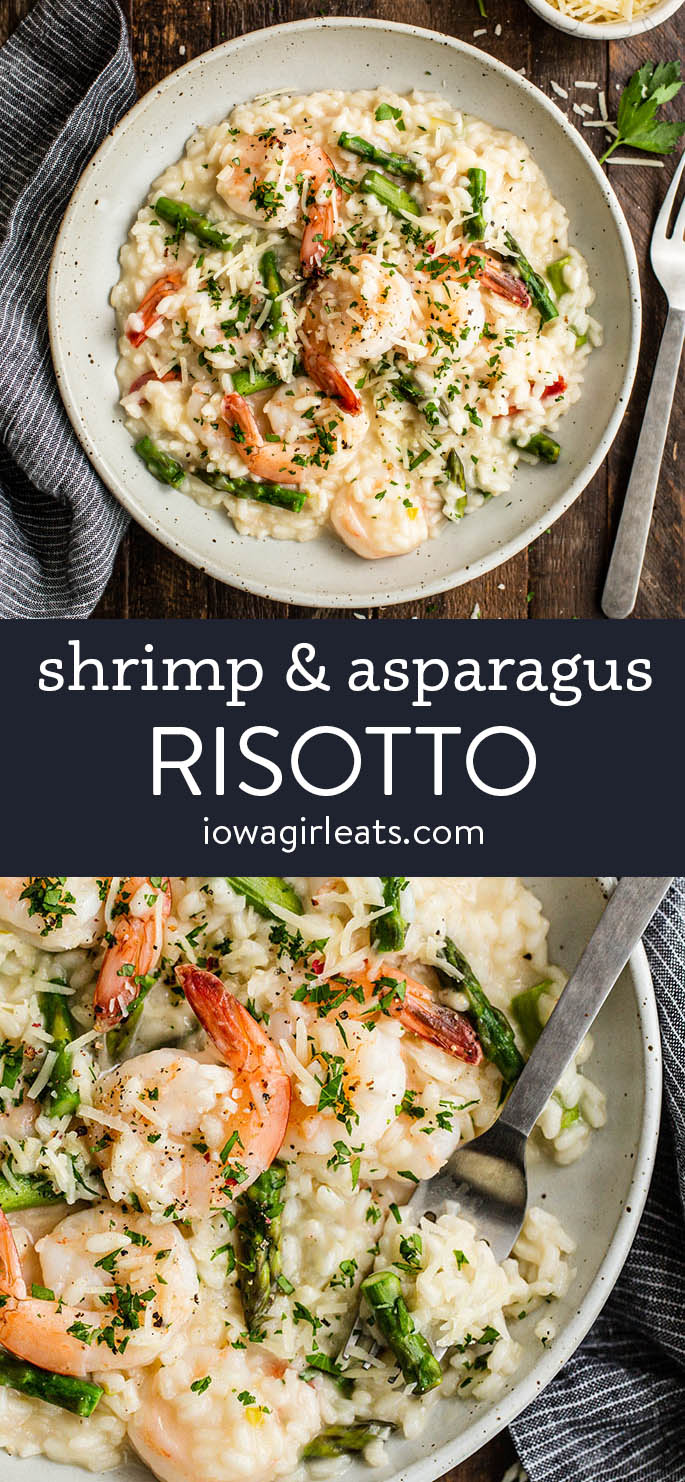
Shrimp and Asparagus Risotto is rich, creamy, and tastes like it came from a restaurant. This easy, spring-forward dish is practically fool-proof!

I made a very special recipe for you just in time for spring: Simple Shrimp and Asparagus Risotto is mouthwatering!
Creamy and tender with the craveable flavors of garlic butter, parmesan cheese, and briny shrimp. If you’ve been hesitant to try your hand at making risotto, don’t be.
If you can stir, you can make risotto — that’s all there is to it!
Watch How to Make It
Risotto is EASY!
Sure the rumors are partly true — yes, there is stirring involved in making risotto, about 30-40 minutes total, but risotto is NOT a fussy dish. It’s actually kind of foolproof, provided you don’t walk away to, idk, paint your nails, sort the mail, or mop peanut butter off the floor (thanks Cam, my man!) — all tasks I considered tackling while stirring this gorgeous dish. Hang tight though, and I promise it will be worth the effort.
Stirring is actually what makes risotto risotto. Risotto is made with short grain arborio rice which releases its starch as it is slowly stirred and cooked in hot chicken stock. That’s it! No searing, no boiling – just stirring over medium heat until the rice is creamy and tender.
That said, Shrimp and Asparagus Risotto is a fantastic recipe to get kids involved in making if they’re at an age where they can be around a hot stove/burner safely, because its extremely simple yet the results are outstanding. Truly it feels and looks and tastes like a restaurant-quality dish, plus the ingredients are all ones I usually have on hand in the fridge, pantry and freezer. Here’s what you’ll need…
Ingredients Needed
- Chicken Stock: I prefer chicken stock over chicken broth because it gives the risotto extra flavor. Broth will do in a pinch though.
- Butter: Butter adds to the risotto’s creaminess and flavor. I always cook with salted butter.
- Shallot and Garlic: I like an offensive amount of fresh garlic in this dish – it plays SO well with butter – while shallots add depth of flavor.
- Arborio Rice: Risotto is made with starchy arborio rice, whose grains look like little oblong beads. I like Rice Select and Lundberg Family Farms brands.
- Dry White Wine: A generous splash of white wine adds to the complexity of this dish. I like sauvignon blanc or pinot grigio. Just don’t use anything sweet like a sweet riesling or moscato. If you don’t keep alcohol in the house, you can use a touch more chicken stock in its place.
- Asparagus: Chopped asparagus is added to this risotto as a nod to spring, plus the flavor pairs perfectly with shrimp. I prefer using stalks that aren’t pencil thin so they don’t overcook in the dish.
- Shrimp: Jumbo shrimp cook right in the hot risotto, lending a seafood flavor to the dish as they become tender and plump. I prefer 16/20 count jumbo shrimp (meaning there’s 16 – 20 shrimp in 1lb) though you can use what you like or have on hand. If you’re using shrimp that are smaller than jumbo, just know they’ll cook faster so you’ll want to add them near the very end of the risotto cooking process.
- Parmesan Cheese: Similar to the garlic, we’re going the offensive route with the amount of parmesan cheese added to the risotto at the very end! Parmesan cheese adds a savory salty flavor and MMM! It almost makes the Shrimp and Asparagus Risotto taste like mac and cheese (in a very good way!)
(Looking for more ways to enjoy shrimp and asparagus? Try my 15 minute Shrimp and Asparagus Skillet!)
Tips for Making Shrimp and Asparagus Risotto
- Low and slow. As I mentioned, continuously stirring the risotto is the “hardest” part of this recipe. A gentle, slow stir with a spatula will do you – I usually stir in a figure 8 motion. Stirring is what causes the rice to release its starch which, in turn, creates a creamy, dreamy risotto.
- The right rice. You can find Arborio rice in the regular rice aisle at the grocery store and/or in your grocery store’s health food area. Again, I love Rice Select and Lundberg Family Farms brands. Whatever brand you end up using, be sure it’s a high quality rice so you get the most bang for your buck (ie, time spent stirring!)
- Warm stock. Be sure to heat the chicken stock in a saucepan before adding to the risotto. Adding cold or room temperature stock to the rice will cause the temperature to drop and the rice won’t cook as quickly or evenly.
Alrighty, press play on an audiobook and pour yourself a glass of wine (or maybe that’s just me?!) and let’s get to it!
How to Shrimp and Asparagus Risotto.
Start by bringing chicken stock to a boil in a saucepan then turn the heat off and place a lid on top to keep the stock hot.
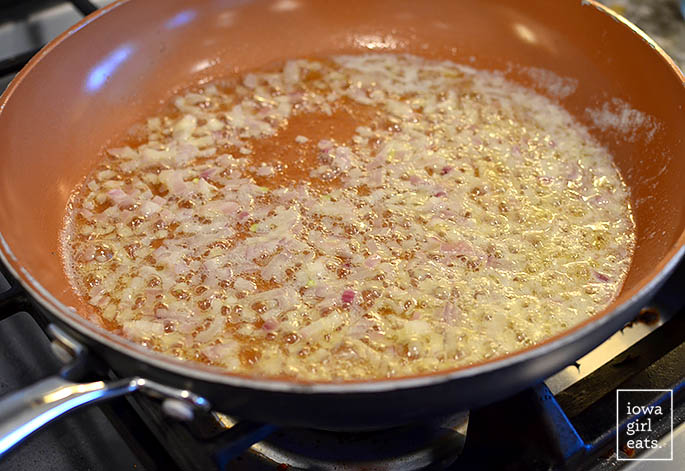
Then, in a large 11-12″ skillet next door, saute minced shallot and garlic in butter until the shallots are tender and the garlic is very fragrant.
Add arborio rice then stir to coat in the butter and cook for 1 minute while stirring.
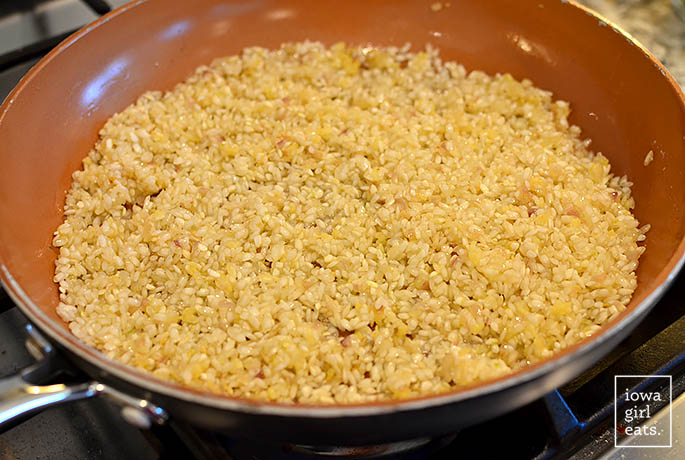
To the rice add a big glug of white wine then stir until it’s nearly absorbed. This will happen pretty quickly, FYI. Choose a dry, non-sweet wine like pinot grigio or sauvignon blanc over a sweet moscato or riesling which would give the final dish a sweet note.
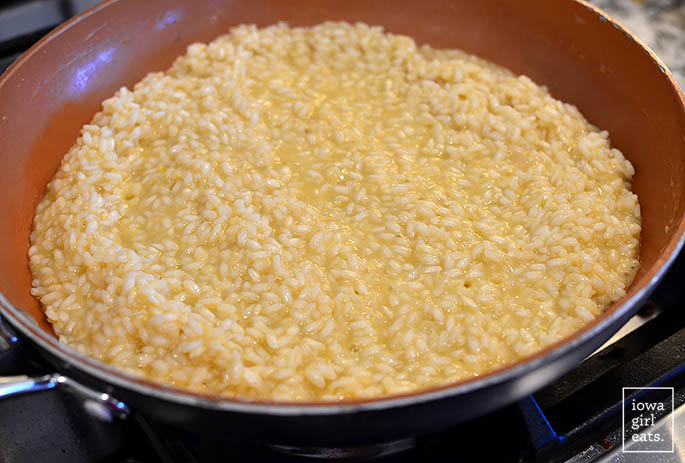
Next add the hot chicken stock one ladleful (1/2 cup) at a time, stirring gently and constantly until the stock is nearly absorbed before adding the next ladleful. You’ll start to see the rice grains plumping and thickening more and more after each addition of stock.
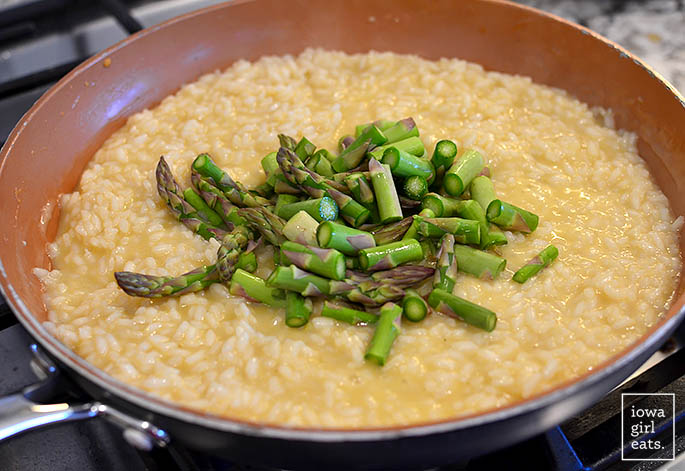
When there’s roughly four ladlefuls of chicken stock left to be added, add chopped asparagus then continue stirring. Again, I prefer thicker asparagus spears over thin ones because they won’t overcook as easily.
When there’s two ladlefuls left add jumbo shrimp that have been peeled and deveined then continue to stir, stir, stir.
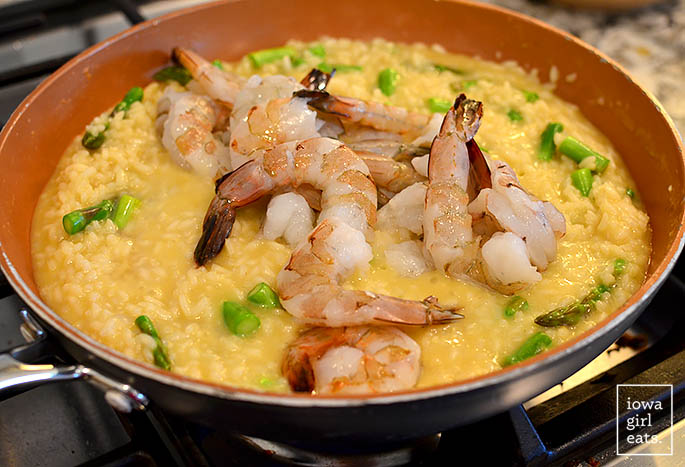
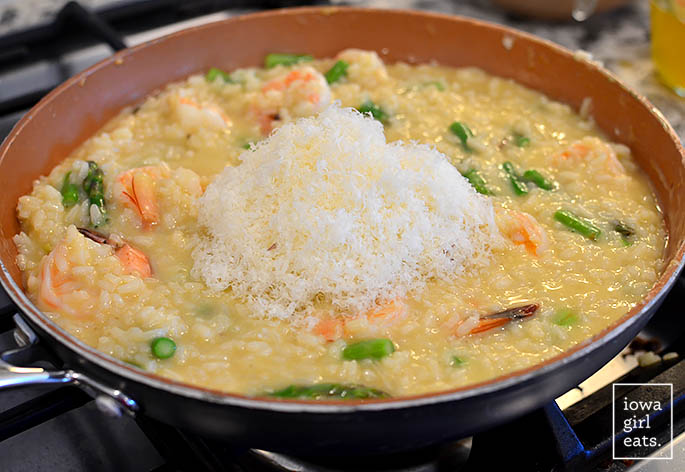
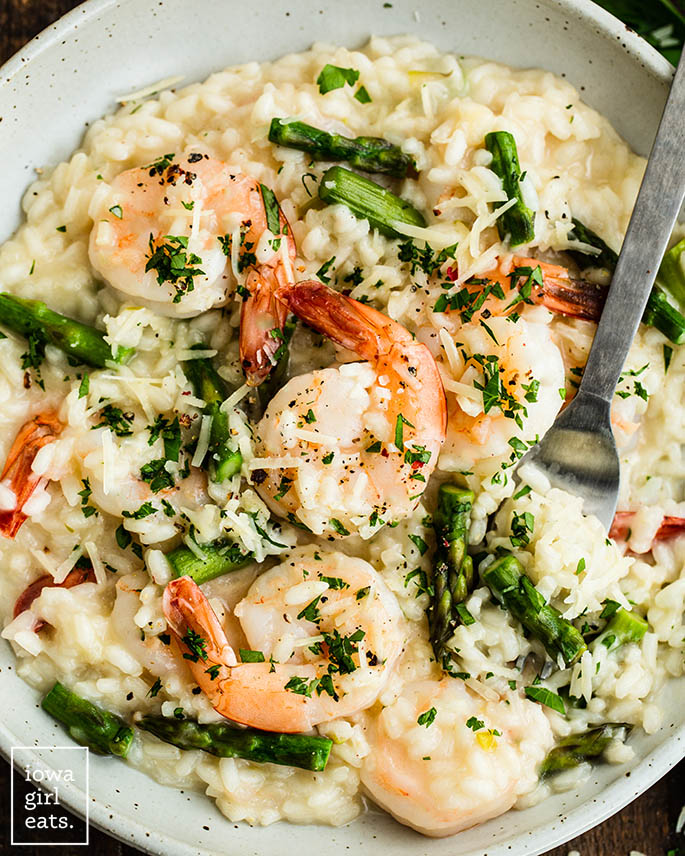
Once the rice is tender, and the shrimp and asparagus are cooked through, you’re done! Turn the heat off then stir in a mountain of freshly grated parmesan cheese, then taste and season with salt and pepper to taste.
Wasn’t that simple?! This Shrimp and Asparagus Risotto tastes and looks so elegant, yet I love that all the ingredients are everyday ones I always keep on hand, plus it’s so so very easy to make. Whether it’s your first time or 100th time making risotto, I hope you love this gorgeous, delicious dish – enjoy!
More Creamy Risotto Recipes
- Easy Mushroom Risotto
- Sweet Corn Risotto
- Bacon, Leek and Mushroom Risotto
- Tomato Basil Risotto
- Shortcut Butternut Squash and Sage Risotto
- Chicken Piccata Risotto

Ingredients
- 6 cups chicken stock
- 4 Tablespoons butter
- 1 shallot, minced
- 4 cloves garlic, pressed or minced
- 1-1/2 cups arborio rice
- 1/2 cup dry white wine, pinot grigio or sauvignon blanc recommended
- 1 cup asparagus chopped into 1” pieces
- 1 lb 16/20 count jumbo shrimp, peeled and deveined
- 1 cup freshly grated parmesan cheese
- salt and freshly cracked black pepper
Directions
- Bring chicken stock to a boil in a medium-size saucepan over high heat then turn off heat and place a lid on top to keep stock hot.
- Melt butter in a large, 11-12” skillet over medium heat then add shallot and saute until softened, 2-3 minutes. Add garlic then saute until very fragrant, 1 more minute.
- Add rice then stir to coat in butter and cook while stirring for 1 minute. Add wine then stir slowly and continuously until nearly absorbed by rice – this will happen quickly. Add 1/2 cup (1 ladleful) chicken stock then stir slowly and continuously until nearly absorbed by the rice. Continue adding stock 1/2 cup / 1 ladleful at a time, stirring slowly and continuously until it's nearly absorbed by the rice before adding the next addition.
- When there’s ~4 additions of stock left, add asparagus then continue to stir and cook. When there’s ~2 additions of stock left, add shrimp then continue to stir and cook until rice is tender and shrimp is cooked through. The entire process should take between 35-40 minutes. If you find the rice is completely tender before the last of the stock is added – that’s fine! You may not need to add all of it.
- Turn off heat then stir in parmesan cheese, and then add salt and pepper to taste. Serve immediately.
Notes
- I prefer using thicker vs pencil-thin stalks of asparagus for this dish. If all you can find are very thin spears, add the asparagus when there’s only 3 ladlefuls of stock left to add so they don’t overcook.
Nutrition
Nutritional values are estimates only. Please read our full nutrition information disclaimer.
Photos by Ashley McLaughlin


I have tried similar recipes but yours is absolutely the best. It is easy and delicious!
I’m so happy to hear this, Caroline!! Thank you so much for your feedback and recipe rating!
Delicious! Will definitely make again and again😋
Made this last night and it was delicious. I cooked the rice up to the e point of add adding the asparagus, cooled it down and finished it off just before serving. I added and extra bit of butter with the cheese and sprinkled with chopped parsley. Will definitely make again!
Sounds so delicious, Patty, and great idea to prep ahead of time. Thank you so much for your feedback and recipe rating!
Absolutely amazing ! Mine turned out saucier than yours, but it was exactly what I was going for!
Oh I’m so, so glad to hear this, HA! Thrilled it was a hit. :)
Great recipe! I’ve made this dish twice and it was a hit both times. Super simple and delicious!
I’m thrilled to hear this, Heather! Thank you so much for your feedback!
Just fabulous and not really difficult at all. Great flavor! Great instructions!
Thrilled to hear this, Lynnie! Thank you so much for your feedback!
Awesome!!!! Took leftovers to school where I work and they loved it. Regretting it because I got home and had none! So I made a half batch! The asparagus and shrimp cooked beautifully at the times you said.
Ha, I can relate! Always sad when the risotto runs out. :'(
Stellar dish, highly recommend preparing exactly as the IGE outlines, kids and grandparents loved it!
I’m so happy to hear that!! Thank you so much for your feedback and recipe rating!
I’ve never dared to make risotto until this – but Kristin’s instructions made it easy to create a perfectly DELICIOUS dish! Will make this again and again!
I am THRILLED this recipe was a hit, Katie!! Thank you so much for your feedback and recipe rating!
Thank you
I made this for mother’s day. It was my first time making Risotto and it turned out AMAZING!!!!!! Highly recommend!
I’m sooo glad you loved it, Rebecca! Thank you so much for your feedback and recipe rating!
Made your risotto recipe. My son loved it.