Perfect Gluten Free Pie Crust is made from just 5 ingredients, including salt and water. Use this flaky, flavorful, all-butter crust as the base for your favorite fruit, custard, quiche, or no-bake pie recipe. It freezes beautifully, too!

“Your directions were so helpful and thorough – many thanks. I feel like I finally conquered the GF pie crust!”
Welcome to the ultimate guide on how to make a Gluten Free Pie Crust!
I’ve made this recipe a dozen+ times over the past several months, and logged every tip and insight I’ve learned along the way.
Use this gluten free pie crust recipe to make holiday classics like Pumpkin Pie or Apple Pie, brunch-staples like quiche, or fill with the no-bake pie filling of your choice.
All you need are 5 everyday ingredients – plus the helpful tips and photos I’ve included in this post – to make the process as easy as pie.
Had to. ;)
Watch How to Make It
Table of Contents
- Watch How to Make It
- 5 Ingredients Needed
- Helpful Tools for Making Pie Crust
- When to Partially Bake or Blind Bake the Crust
- Recipe Tip
- Top 3 Tips for Success
- Gluten Free Pie Crust Overview
- How to Make Gluten Free Pie Dough
- How to Roll Out the Pie Crust
- Troubleshooting Tips
- How to Partially Bake or Fully Blind Bake the Pie Crust
- How to Freeze Gluten Free Pie Crust
- Gluten Free Pie Crust Recipe
5 Ingredients Needed
- Gluten Free Flour Blend: I tested this recipe using Cup4Cup Multipurpose Flour and Bob’s Red Mill Gluten Free 1-to-1 Baking Flour and don’t notice a huge difference between the two. That said, the gluten free-flour blend you typically bake with and enjoy will likely work in this recipe. Be sure the blend includes a binder such as xanthan gum.
- Butter: this is an all-butter pie crust recipe which makes for a gorgeous and flaky golden brown crust with lots of flavor. Very croissant-like.
- Granulated Sugar: promotes browning and adds flavor to the crust.
- Salt: balances the flavor of the crust.
- Ice Water: brings the pie crust ingredients together.

Helpful Tools for Making Pie Crust
Pies in various forms have been around for thousands of years so don’t overthink the process. That said, here are the tools I use to make modern-day + gluten-free pie making easier.
- Food processor: My 14 cup Cuisinart Food Processor makes quick work of mixing the gluten free pie crust ingredients together, but a large mixing bowl and pastry cutter work too.
- Bench scraper: A bench scraper helps ensure the pie dough doesn’t stick to the work surface.
- Pie pan: This pie dough recipe will fill a 9 – 9-1/2″ glass pie pan or ceramic pie pan.
- Silicone baking mat: I LOVE THIS THING! Nonstick, no messy counters, inexpensive, has diameter lines right on the mat… Shall I go on?
- Rolling pin: I prefer a steel rolling pin vs a wooden rolling pin because you can freeze it to keep it cold when rolling out the dough. If you only have a wooden rolling pin BE MINDFUL of what it’s previously been used to roll out as wooden rolling pins, cutting boards, etc. can hold onto gluten.
- Pie weights: If you plan on par-baking or fully blind-baking the pie crust to use for wetter pie fillings, or a no-bake pie, you’ll want 2lbs pie weights per 9″ crust. That said, dried rice, beans, lentils, or even granulated sugar work too.
- Pie crust shield: A silicone pie crust shield is great to have on hand when baking future, full pie recipes.

Pin this now to find it later
Pin ItWhen to Partially Bake or Blind Bake the Crust
If your pie filling is on the wet side, or is no-bake, you’ll need to partially bake or fully bake the pie crust before using so it doesn’t come out raw or soggy in the final pie. Here are the details:
- Partially baked or “par-baked”: is needed for pie recipes with wetter fillings like pumpkin pie, juicy berry/fruit pies like blueberry or peach, pecan pie, or quiche. Fill the pie crust with pie weights then bake until the edges are light golden brown. Remove the weights then bake for a couple extra minutes.
- Fully blind-baked: is needed for no-bake pie recipes like French Silk Pie or Banana Cream Pie. Follow the directions for par-baking the crust then remove the pie weights and continue baking until the entire crust is golden brown and fully cooked through. More details on both options below.
Recipe Tip
Because gluten free flour baking blends contain starches and flours that don’t typically act like wheat flour, I almost always par-bake my gluten free pie crust no matter what type of pie I’m making.

Top 3 Tips for Success
Making gluten free pie crust is inherently simple, but keep these important tips in mind when making this recipe. Be sure to read the entire post for more helpful tips and notes.
- The dough is different. Think of gluten free pie dough as playdough that you need to guide, push, and press into shape, vs regular dough which can be pulled and stretched.
- Keep cold. Keep the butter as cold as possible throughout the process of making the pie dough and rolling it out to ensure a flaky final pie crust. Work quickly when making and rolling out the dough, and be sure to follow timing guidelines in terms of how long to refrigerate the dough and pie crust.
- Don’t rush. I like to give myself two days to make gluten free pie crust. On day one I’ll make the dough then refrigerate it overnight. On day two I’ll roll it out, refrigerate the crust for an hour, then bake. This ensures that the butter stays very cold, and the gluten free flour blend has plenty of time to hydrate.
Gluten Free Pie Crust Overview
- Make the dough.
- Combine the ingredients in a food processor.
- Press the dough together with your hands.
- Laminate the dough.
- Refrigerate the dough for 2 hours – 3 days.
- Roll out the crust.
- Roll the dough into a 12″ circle.
- Line a 9″ pie pan with the crust.
- Trim the edges then crimp or flute.
- Refrigerate the crust for 1 hour or up to 3 days then use.
- Fully or partially bake the pie crust. Optional, for a wet or no-bake pie filling.
How to Make Gluten Free Pie Dough
Step 1: Pulse the ingredients together in a food processor.
To a large food processor add gluten-free flour, sugar, and salt then pulse a few times to combine.
Cut butter into 1/2″ cubes then freeze on a plate for 20-30 minutes. Add the cubes to the dry ingredients then pulse until the butter breaks down into a gravelly texture.
Use a pastry cutter instead.
If you don’t have a food processor, add the ingredients to a large glass mixing bowl then use a pastry cutter to cut the butter until it becomes gravelly. Use a fork to stir in the ice water in the next step.

Step 2: Add ice water to bring the dough together.
You’ll want actual ice water in order to keep the butter cold. Fill a glass measuring cup with ice then fill it with water and let it sit on the counter or in the refrigerator for at least 5 minutes.

Drizzle 4 Tablespoons ice water into the food processor shoot while pulsing to combine, then add an additional 4 Tablespoons ice water while pulsing.
Grab a small amount of dough with your fingers then pinch it together – if it crumbles and falls apart, pulse in an additional 1 Tablespoon water at a time.
If the dough sticks together, but is not wet and sticky, the dough is ready. If it IS too wet and sticky – meaning, you’ve added too much ice water – you can incorporate a little more flour in the next step.
How much water should I use?
The total amount of water you’ll need depends on the gluten free flour blend and how “thirsty” it is. In general, gluten-free flour blends are more thirsty then all-purpose flour, so you’ll need to use more water compared to a traditional pie crust. I typically add 1/2 + 2 Tablespoons (ish) to the Cup for Cup Multipurpose Flour Blend.

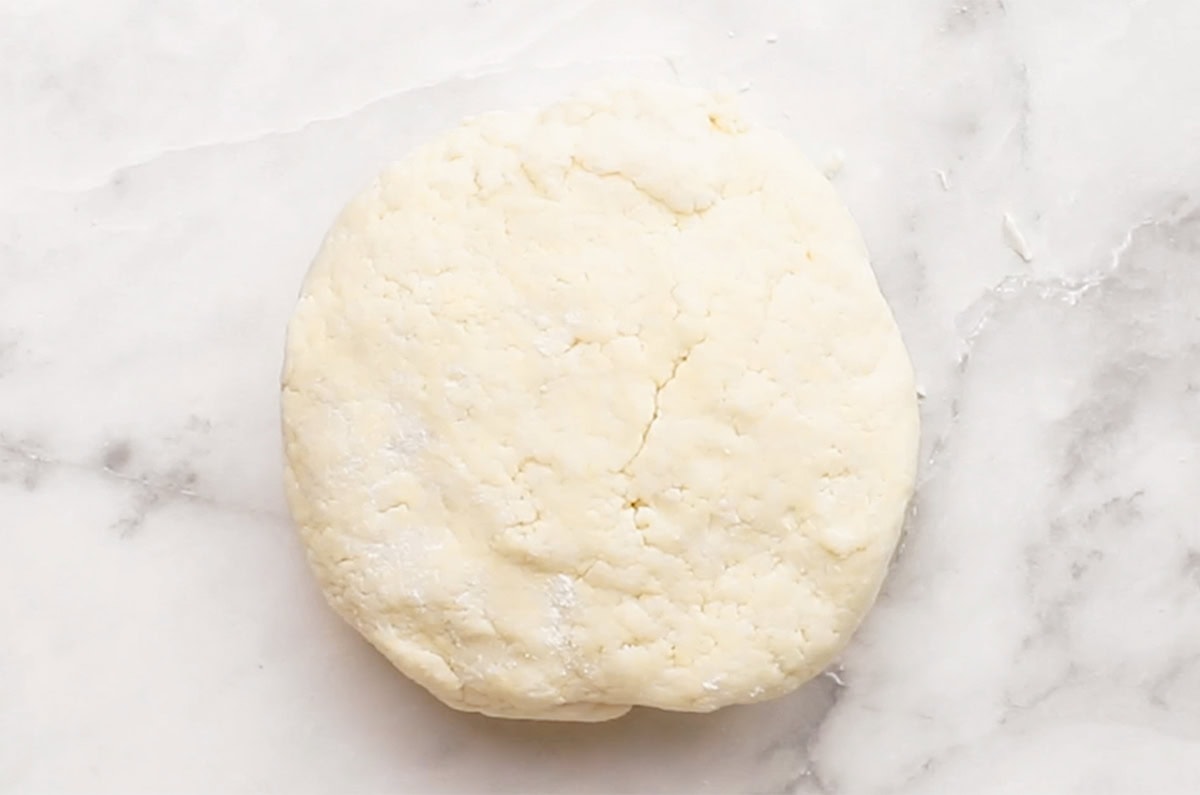
Step 3: Press the dough together.
Pour the dough onto a clean, dry, flat work surface (again, I love this baking mat!) then press it together into a ball with your hands.
- Too dry? Drizzle a teaspoon of ice water at a time over the dough then knead it in.
- Too wet? Sprinkle gluten-free flour on top then knead it in.
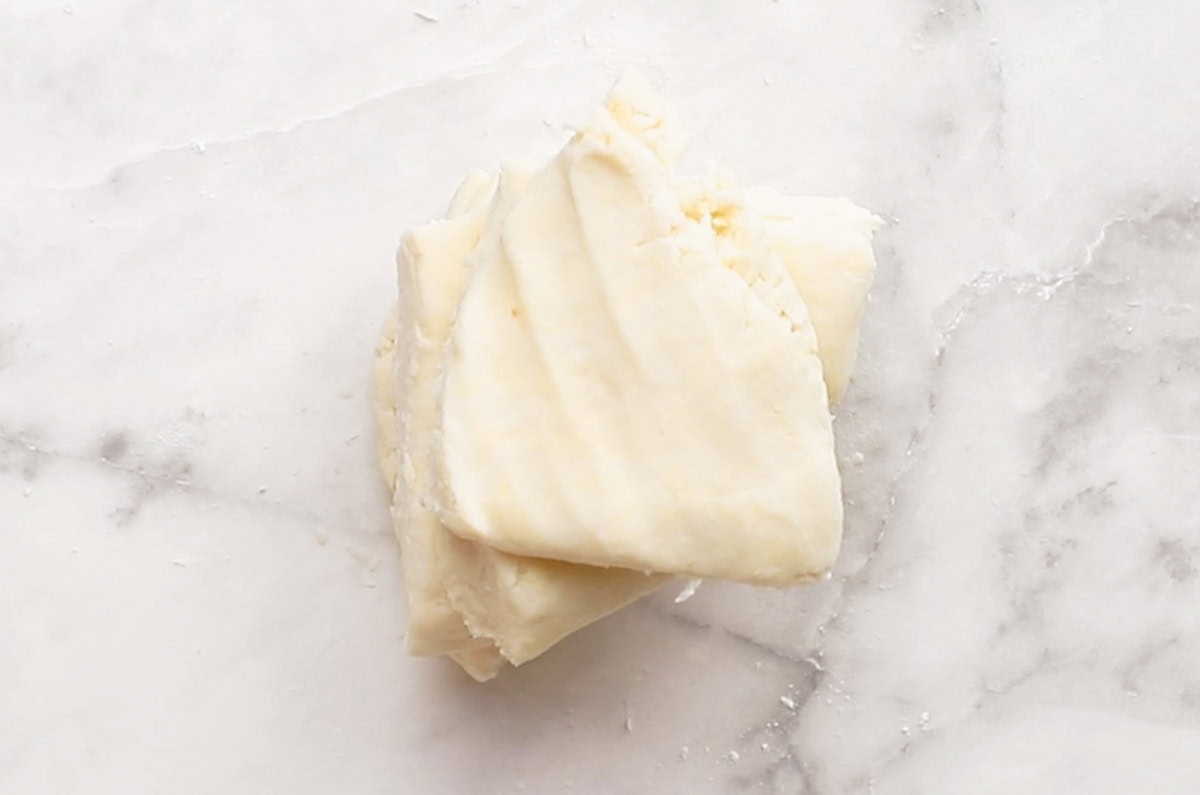
Step 4: Laminate the dough.
Laminating the dough, which means to create lots of layers of butter, will create an ultra-flaky pie crust. Here’s how:
- Stack half: press the dough ball into a disc then use a bench scraper or knife to slice the disc in half. Stack the two halves on top of each other then press down from the top and shape the dough back into a disc.
- Stack quarters: next, slice the disc into quarters then stack them on top of each other. Use your hands to press down on the stack of dough then shape it back into a disc.
If doubling the crust recipe, slice the dough ball in half then laminate each half as you would for a single pie crust recipe (stack halves, then stack quarters).
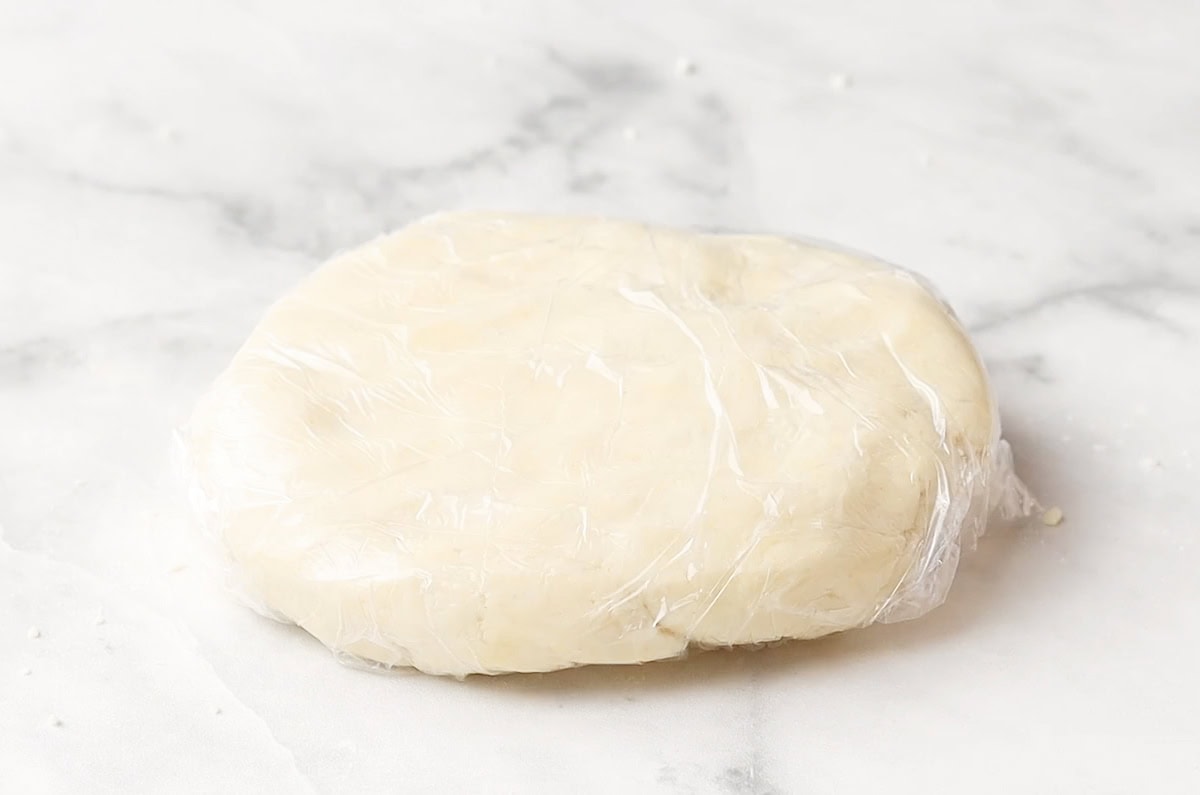
Step 5: Refrigerate the pie crust.
Cover the dough in plastic wrap then refrigerate for at least 2 hours and up to 3 days. I like to let my pie crust dough sit in the refrigerator overnight.
How to Roll Out the Pie Crust
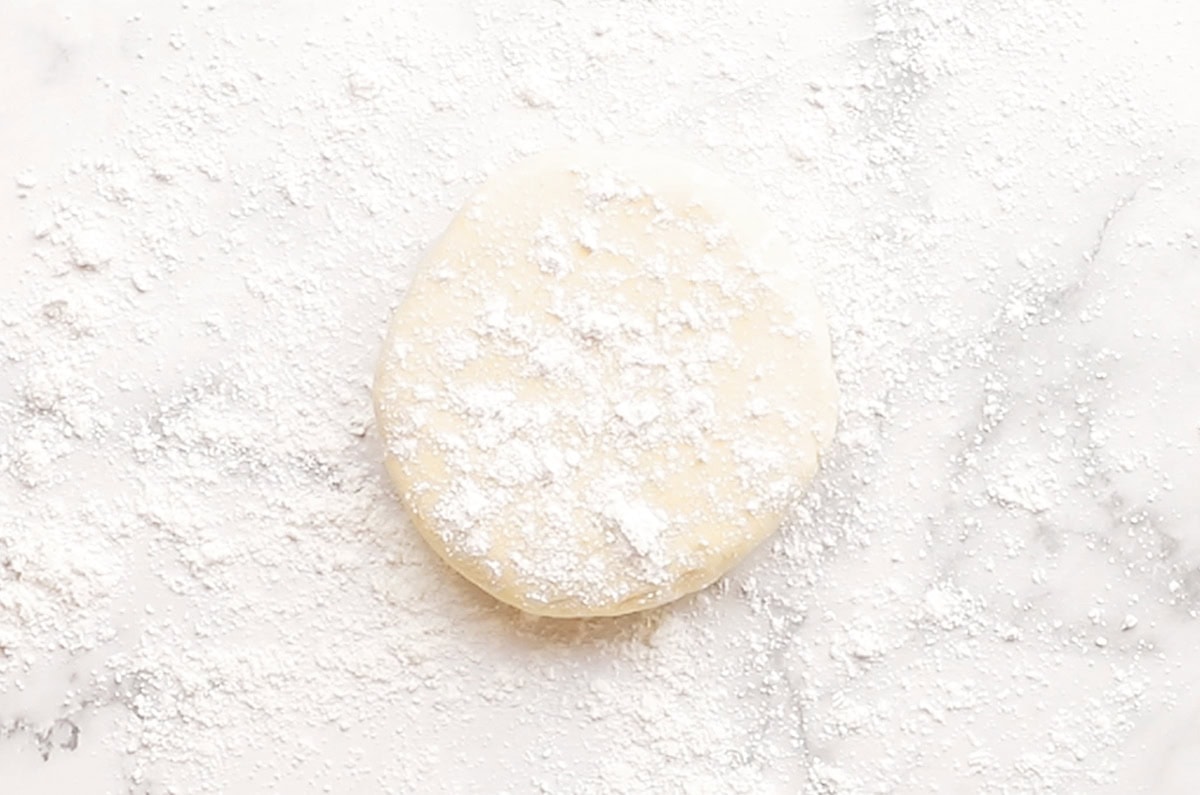
Step 1: Place the dough ball on a floured surface.
Unwrap the chilled dough, place it on a gluten free-floured work surface, then sprinkle the top with more gluten free flour.
Step 2: Roll the dough into a 12″ circle.
Use a rolling pin to roll the dough into a 12″ circle, rotating it and occasionally using your hands to help cup and shape the dough into a circle.
Troubleshooting Tips
- Cracking crust. If your crust cracks while rolling, but is not too dry, it’s likely just a bit too cold. Let the dough warm up for a minute then try again. If it keeps cracking, wet your fingers with ice water then pinch the dough together.
- Sticky crust: Did you add too much water to your dough, and now it’s sticky? Use a bench scraper to occasionally scrape underneath the crust and rotate the dough so it doesn’t stick to the counter, AND add dashes of GF flour on top and under the dough as needed. I find using a silicone baking mat really helps prevent sticking.

Step 3: Transfer the crust to a pie pan.
Use the bench scraper to help transfer the pie crust into a 9 – 9-1/2″ pie pan that’s been chilling in the freezer. Use your fingers to help guide the crust into the bottom and sides of the pan.
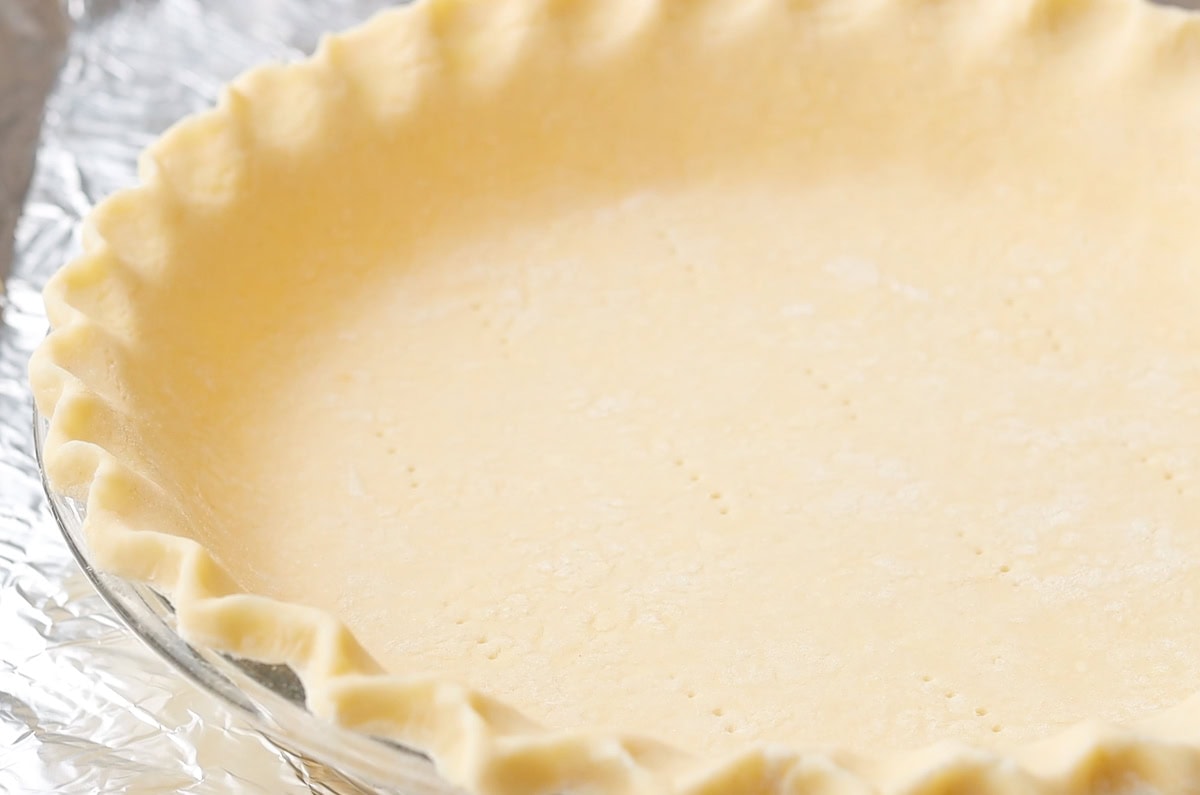
Trim away excess dough from the edges with kitchen shears (you won’t have much), leaving ~1/4″ overhang, then tuck the overhang underneath so the dough is flush with the top of the pie pan. Flute the edges with your knuckle and fingers, or crimp with the tines of a fork.
How to thicken up thin spots in the crust.
If you have spots on the edge of the crust that are a little thin, use scraps from trimming to thicken them up. Wet the scrap with a little ice water on your finger then press it into place. You can also use scraps to patch up any thin spots on the bottom or sides of the crust.
Refrigerate the dough for 1 hour, or cover with saran wrap and refrigerate for up to 3 days. After chilling, the pie crust is ready to be used in any pie recipe that calls for an unbaked pie crust. Again, though, I always par-bake homemade gluten free pie crust no matter what.
How to Partially Bake or Fully Blind Bake the Pie Crust
Option 1: Par-bake the crust.
If you’re making a pie that has a wet filling, such as a pumpkin pie, blueberry or peach pie, pecan pie, or a quiche, it’s important to partially bake or “par-bake” the crust before adding the filling so it doesn’t come out raw or soggy.
Start by placing the pie pan on a foil-lined, rimmed half sheet pan then use a fork to make shallow pricks all over the bottom of the pie crust. Not too deep otherwise the filling can seep through the pricks.
Next, crumple a piece of parchment paper then spread it back out and place it into the bottom of the pie crust, pressing it gently up the sides and over the rim of the crust to protect it from over-browning.
Fill the pie crust all the way to the top with pie weights, taking care to gently press them all the way up the sides. This will ensure the pie crust keeps its shape and doesn’t sink.
What to use instead of pie weights.
If you don’t have pie weights, you can use dry rice, beans, lentils, or even granulated sugar. Use enough to fill the pan all the way to the top of the crust.

Place the sheet pan on a rack placed in the lower third of a 400 degree oven then bake until the edges of the crust are light golden brown, 15-20 minutes, rotating the pan halfway through.
Carefully remove the pie weights then pour them into a bowl. Put the crust back into the oven then continue to bake until the bottom is pale and dry-looking, 4-8 more minutes.
Let the pie crust cool slightly before adding the filling of your choice and fully baking.
Option 2: Fully blind bake the crust.
If you’re making a pie with a no-bake filling, such as a Banana Cream Pie or Chocolate Silk Pie, you’ll want to fully blind-bake the crust. Follow the steps for par-baking above, but tack on several extra minutes after removing the pie weights and keep baking until the entire crust is golden brown, 10-12 minutes total after removing the weights.
Let the pie crust cool completely before adding the no-bake pie filling of your choice.
How to Freeze Gluten Free Pie Crust
- To freeze the dough: place the plastic-wrapped-dough disc inside a Ziplock freezer bag then freeze for up to 3 months. Thaw in the refrigerator for at least 24 hours before rolling.
- To freeze the pie crust: wrap the pie pan with the crust inside (either unbaked, par-baked, or fully blind-baked) in plastic wrap followed by foil. Freeze for up to 3 months. You may fill and bake the raw pie crust from frozen, though you may need to tack on an extra few minutes of baking time.
No go forth, and bake the gluten free pie of your dreams – enjoy!

More Gluten Free Dessert Recipes To Love
- Chocolate Peanut Butter Pie
- Gluten Free Shortbread
- Gluten Free Chocolate Cupcakes
- Gluten Free Angel Food Cake
- Gluten Free Soft & Chewy Sugar Cookies
- Gluten Free Vanilla Cupcakes
- Perfect Gluten Free Chocolate Chip Cookies
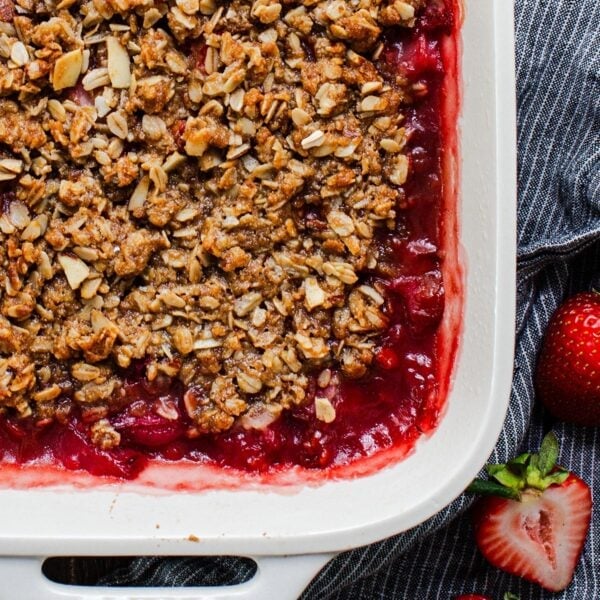
- Triple Berry Crumb Bars
Ingredients
- 9 Tablespoons unsalted butter
- 1-1/2 cups gluten free baking flour blend WITH binder, see notes
- 1 Tablespoon granulated sugar
- slightly heaping 1/2 teaspoon salt
- 1/2 – 3/4 cup ice water, depending on flour blend used, see notes
Directions
- Read the post above in its entirety for tips and photos.
Make the dough:
- Dice the butter into 1/2" cubes then freeze the cubes on a plate for 20-30 minutes.
- Add the gluten free flour blend, sugar, and salt to the bowl of a large food processor then pulse several times to combine. Add the frozen butter cubes then pulse until the butter has a gravely texture.
- Drizzle 4 Tablespoons ice water into the food processor shoot while pulsing the dough. Add 4 more Tablespoons ice water while pulsing to combine. Check the dough consistency – if it stays together when you pinch a small handful of dough, it’s ready. If it crumbles apart after pinching, pulse in 1 – 2 Tablespoons additional ice water at a time until the dough comes together. It shouldn’t be extremely wet and sticky, but it shouldn’t dry either. NOTE: the total amount of water you’ll need depends on the gluten free flour blend used and how “thirsty” it is. In general, gluten free flour blends are thirstier than all-purpose flour, and will require more ice water compared to traditional pie crusts.
- Pour the dough mixture onto a clean, dry, flat surface then press with your hands until it comes together in a ball. Press the ball into a flat disc.
Laminate the dough:
- Use a bench scraper or knife to slice the disc in half. Stack the two halves on top of each other then press down from the top and shape the dough into a flat disc again. Use the bench scraper to slice the dough into quarters then stack the quarters on top of each other, press down from the top, and shape the dough once again into a flat disc. Wrap the disc tightly in plastic wrap then refrigerate for at least 2 hours, or up to 3 days. I like to refrigerate overnight.
Roll out the crust:
- Place a 9 – 9-1/2” glass or ceramic pie pan and your rolling pin in the freezer to chill for at least 10 minutes. Set the dough out on the counter to remove the chill for 2-3 minutes.
- Generously dust a clean, dry, flat surface with gluten free flour then unwrap the dough disc, place it down, and sprinkle the top with more gluten free flour.
- Roll the disc into a 12” circle with a rolling pin, adding more gluten free flour as needed to prevent sticking and using a bench scraper to scrape underneath the dough often to ensure it isn't sticking. I also like to pause a few times and use my hands to cup and shape the edges into a circle. See post copy for more tips.
- Troubleshooting: if your dough is too hard to roll out, let it sit and soften for a few minutes then try again. If your dough is too dry and splits or cracks, wet your fingers with ice water then pinch it back together. If your dough is too wet and sticky, sprinkle on more flour. Work as quickly as possible to ensure the butter stays cold and doesn’t begin to melt.
- Use a pastry brush or your hands to brush off any excess flour from the top of the dough and surrounding work area then use a bench scraper or a large metal spatula to scrape underneath the crust and help transfer it into the chilled pie pan. Use your fingers to gently guide the dough against the sides and bottom of the pie pan. Use kitchen shears to trim the edges of the dough to hang 1/4" over the sides – you shouldn't have much – then tuck them underneath so they're flush with the top of the pie pan. Use the scraps to thicken up any thin spots of dough on the top, sides, or bottom of the crust by wetting your finger with ice water and using it like "glue" to adhere the scraps to the crust.
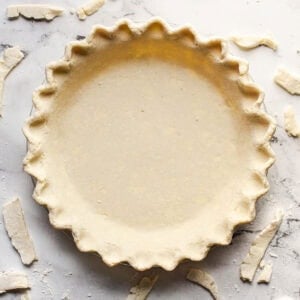
- Flute the edges of the crust with your fingers and a knuckle, or crimp with the tines of a fork, then refrigerate for at least 1 hour, or cover with saran wrap and refrigerate for up to 3 days.
- After chilling, the gluten free pie crust is ready to be used in any recipe that doesn’t require par-baking or fully blind-baking the crust before adding the filling. That said, I almost always par-bake my crust, even if the recipe doesn't call for it, because gluten free baked goods can be gummy if underbaked.
Blind-bake the crust (optional):
- To par-bake the crust: place an oven rack into the lower third of your oven then preheat the oven to 400 degrees. Line a rimmed half sheet pan with foil and place the pie pan on top.
- Use a fork to make shallow pricks all over the bottom of the crust (not too deep or the pie filling can seep through). Crumple a piece of parchment paper into a ball, smooth it back out, then place it inside the chilled pie crust, gently pressing it against the sides, bottom, and over the rim of the pie crust to prevent over-browning. Fill to the top of the crust with pie weights, dried beans, rice, lentils, or granulated sugar then bake until the edges of the pie crust are light golden brown, 15-20 minutes, rotating the pan halfway through.
- Remove the sheet pan from the oven then carefully pick up the edges of the parchment paper and pour the weights into a bowl to cool. Continue baking the crust until the bottom is pale and dry-looking, 4-8 more minutes. Allow the crust to cool slightly before adding your pie filling and baking according to recipe instructions.
- To fully blind-bake the crust: follow the above directions but after removing the weights, bake until the crust is golden brown all over, and fully cooked through, 10-12 minutes. Let the crust cool completely before filling with the no-bake pie filling of your choice.
Notes
- My #1 tip for making gluten free pie crust is to keep the butter/dough, and your cooking equipment (pie pan, rolling pin) as cold as possible at all times so it’s easier to work with, and the butter doesn’t melt too quickly in the oven resulting in an oily, less flaky crust.
- If your pie recipe requires a top and bottom crust, double this pie crust recipe then divide the dough in half just prior to the laminating step.
- If you don’t have a food processor, use a pastry cutter to cut the chilled butter cubes into the flour mixture until they are gravelly in texture. Switch to a fork when adding ice water to stir the mixture together.
- Par-baked or fully blind-baked pie crust are best used the same day, otherwise the crust can become stale-tasting.
- I tested this recipe using Cup for Cup Multipurpose Flour and Bob’s Red Mill Gluten Free 1-to-1 Flour. Different gluten free flour blends have different types and ratios of starches and flours, and will have slightly different liquid needs. Be sure to review the photos in this post for what the dough should look like while mixing it up.
- Use actual ice water when creating the pie dough. I fill a 2 cup glass measuring cup halfway with ice then add water and let it sit on the counter or in the refrigerator for 5 minutes.
- To freeze the dough: place the plastic-wrapped-dough disc inside a Ziplock freezer bag then freeze for up to 3 months. Thaw in the refrigerator for at least 24 hours before rolling out and using.
- To freeze the pie crust: wrap the pie pan with the crust inside (either raw, partially, or fully blind-baked) in plastic wrap followed by foil. Freeze for up to 3 months. You may fill and bake the pie crust from frozen, though you may need to tack on an extra few minutes of baking time.
Nutrition
Nutritional values are estimates only. Please read our full nutrition information disclaimer.

Photos by Ashley McLaughlin


Thank you this recipe. I’ve made GF pie crust with a different recipe that calls for “crisco”. Wanted an all butter recipe, so looking forward to trying your recipe. I always have issues getting the rolled out dough into the pie dish. Do have any other tips/tricks outside of what you already have mentioned? Thank you.
Hi Lydia! The tips listed are my best ones – the one I’d stress the most is not to get too stressed if the dough tears on the transfer (it really shouldn’t though if the dough is cold and rolled to the proper thickness) because you can pinch it back together and no one will be the wiser once the filling is put inside! This is a recipe where each time you make it you’ll get a better and better feel for the dough and process.
Your directions were so helpful and thorough- many thanks. I feel like I finally conquered the GF pie crust!
YAY!! And truly every time I make one, it gets easier. Love this recipe. So glad you did too. Thank you so much for your feedback and recipe rating!
I made this crust for a pecan pie and it was absolutely perfect. Will definitely use again and often. Thank you!!
YAY!! So glad you gave it a go, Ashley!! Thank you so much for your feedback and recipe rating!