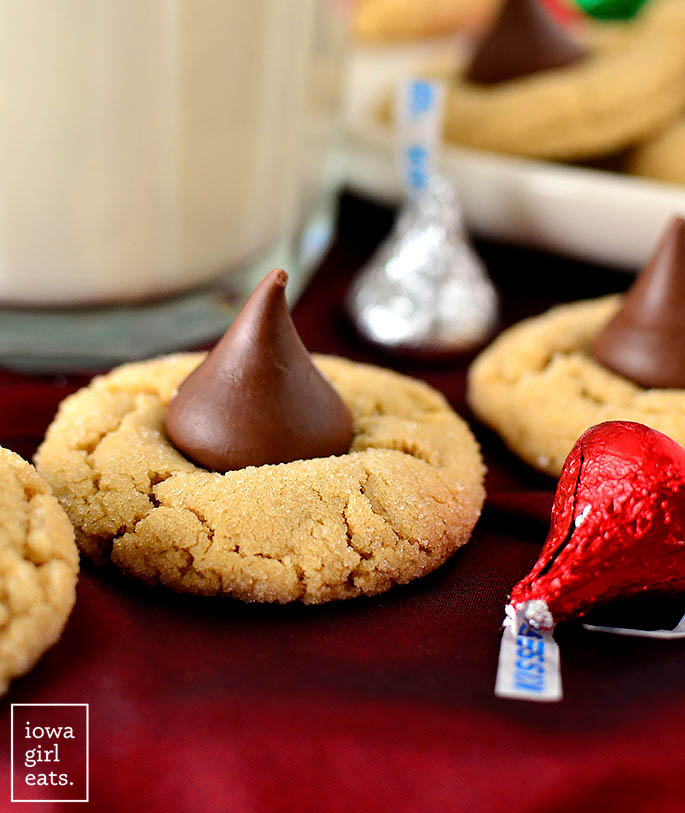
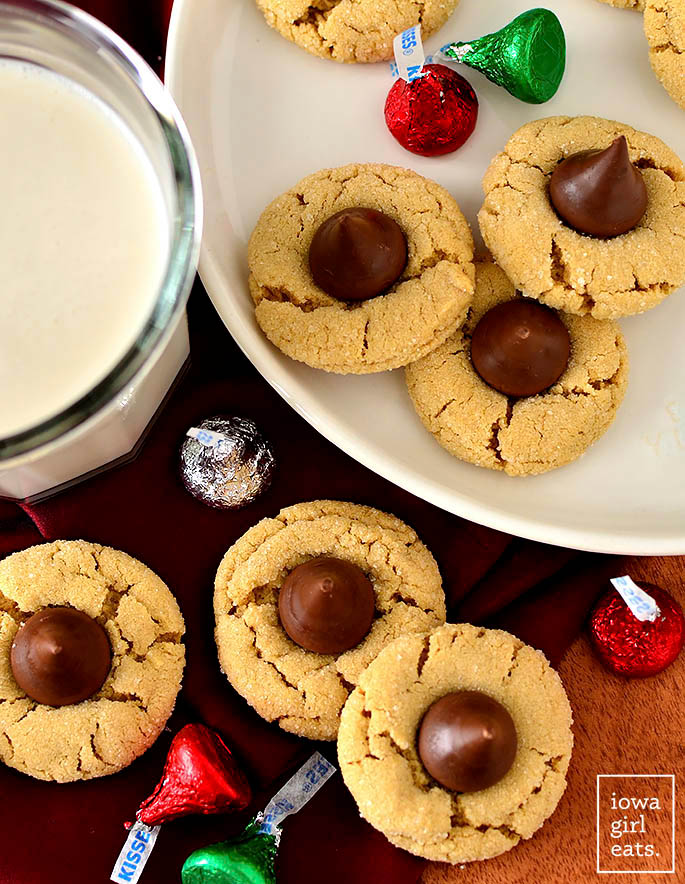
Gluten Free Peanut Butter Blossoms are a classic holiday cookie recipe that are sweet, chewy, and studded with a kiss.

“I made these last night. My peanut butter and chocolate loving celiac son LOVED these.”
One of my favorite things to do is recreate classic holiday recipes to be gluten free, and I can’t tell you how pleased I was to make Gluten Free Peanut Butter Blossoms.
One bite of these Hershey kiss-studded Christmas cookies and I’m instantly transported the holidays as a child. Peanut Butter Kiss Cookies were a staple on my Aunt’s Christmas cookie trays each year, and these taste just like hers.
Luckily the recipe we enjoyed so many years ago can be easily adapted by swapping regular all-purpose flour for GLUTEN FREE all-purpose flour. As for the kisses? They’re already gluten free – wohoo!
Watch How to Make Them
Gluten Free Baking Tips
I get a ton of questions about my favorite gluten free flours, so let me share with you two of my favorites, plus a couple of gluten free baking tips:
- My Favorite GF Flour Blends: Whether I’m cooking or baking, I use Bob’s Red Mill Gluten Free 1-to1 Baking Flour or King Arthur Gluten Free Measure for Measure Flour. These gluten free flour blends already include a binder so I don’t have to mess around with adding xanthan gum, etc. to a recipe.
- Gritty Baked Gluten Free Goods? If you find your gluten free baked goods to be “gritty” in texture, let the dough or batter rest for 10 minutes before baking. This allows the flour to better absorb the liquid in a recipe and soften.
- What GF Flours WON’T Work: Single flours like coconut flour or almond flour, for example, can NOT be used interchangeably for regular all-purpose flour, or gluten free all-purpose flour for that matter. They don’t contain a binder so your baked goods won’t “stick” together, plus different flours have different “thirst” levels. For example, you’ll need more liquid in a recipe calling for coconut flour because coconut flour is extremely absorbent.

Luckily this classic Christmas cookie recipe required just a simple gluten free flour swap from the original and we were off to the races! At the time of this writing, 12/25, Hershey Kisses ARE gluten free in the US, though of course check packaging and/or the company’s websites to verify at the time of your cookie craving.
Alrighty, let’s bake!
How to Make Gluten Free Peanut Butter Blossoms
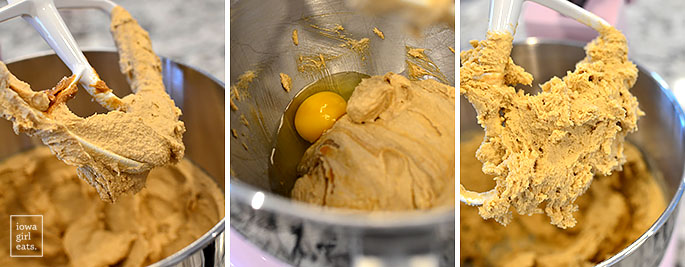
Start by creaming together softened butter, peanut butter, and both white and brown sugars until light and fluffy. Mix in an egg and vanilla extract, followed by a gluten free flour blend whisked with baking soda and salt.
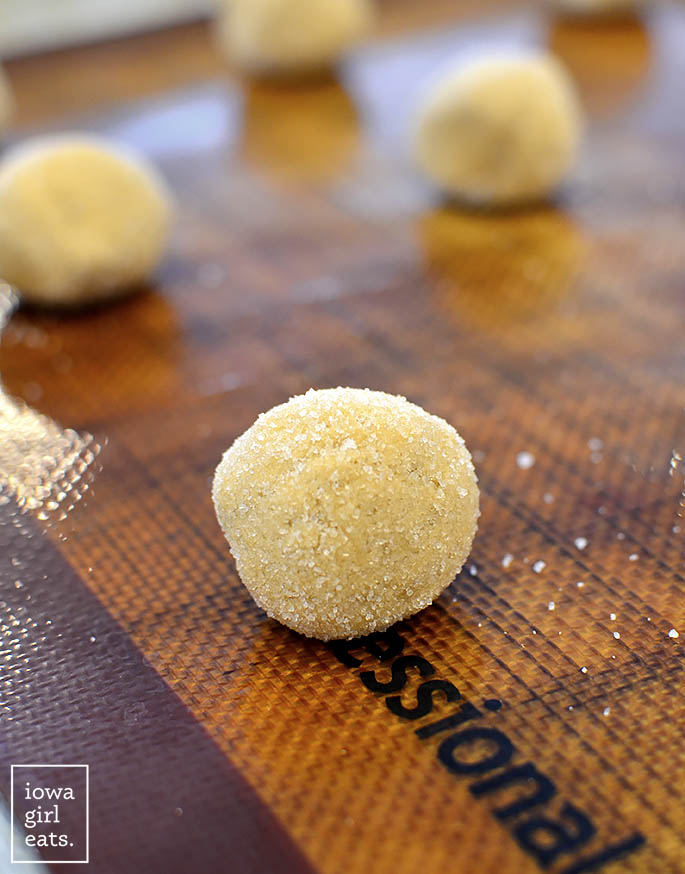
Scoop the dough by the Tablespoon into a bowl of sugar then gently roll to coat and place onto a silpat or parchment paper-covered baking sheet.
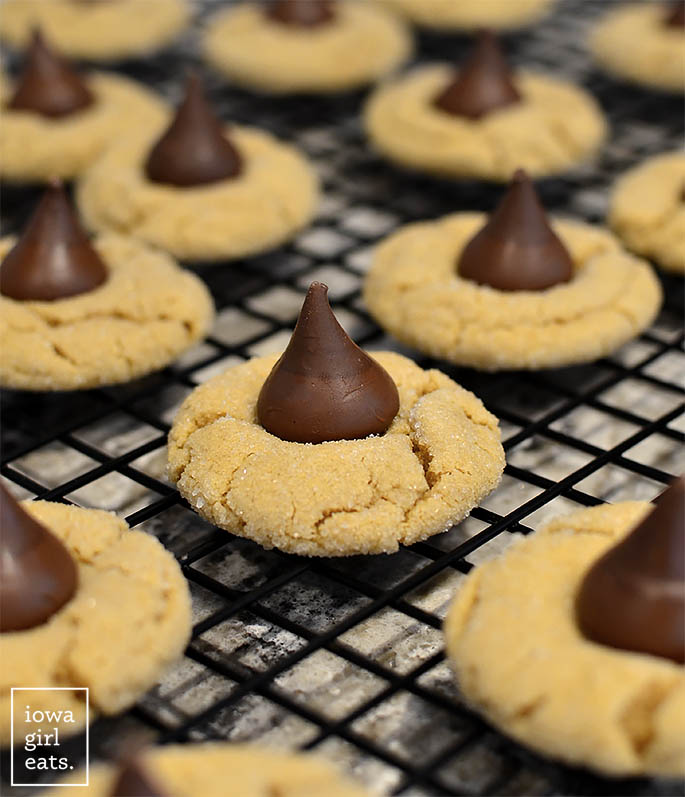
Bake until the tops are just barely beginning to crack, 8-9 minutes – err on the side of under baking vs over baking! – then gently place an unwrapped Hershey Kiss into the center of each one. Transfer to a cooling rack to cool completely. That’s all she wrote!
Crackly with just a hint of raw sugar crunch, peanut butter melded with chocolate…I MEAN! I hope you love this classic Christmas cookie with a gluten free twist! Enjoy!
More Gluten Free Cookie Recipes
- Gluten Free Shortbread
- Soft & Chewy Gluten Free Sugar Cookies
- Gluten Free Sugar Cookie Bars
- Gluten Free Chocolate Chip Cookies
- Soft Batch Ginger Molasses Cookies
- Almond Flour Chocolate Chip Cookies
- Brown Butter Oatmeal Chocolate Chip Cookies
- 10 Gluten Free Christmas Cookies and Treats

Equipment
Ingredients
- 1/2 cup butter, 1 stick, softened to room temperature
- 1/2 cup granulated sugar, plus more for rolling
- 1/2 cup brown sugar
- 1/2 cup peanut butter
- 1 egg
- 1/2 teaspoon vanilla
- 1-1/4 cup gluten free baking flour blend WITH binder, see notes
- 3/4 teaspoon baking soda
- 1/4 teaspoon salt
- 48 Hershey Kisses
Directions
- Preheat oven to 350 degrees then line a baking sheet with a silpat or parchment paper and set aside. Scoop some granulated sugar into a bowl then set aside.
- Add butter, sugars, and peanut butter to the bowl of an electric mixer, or to a large glass bowl if using a handheld mixer, then cream until light and fluffy, about one minute. Scrape down the sides of the bowl then add the egg and vanilla and mix until just combined.
- In a separate bowl, whisk together flour, baking soda, and salt then add to the wet ingredients in two batches, mixing until just combined before adding the next batch.
- Scoop 1 Tablespoon batter at a time into the sugar bowl then gently turn to coat and place on prepared baking sheet. Bake until the tops of the cookies just barely begin to crack, 8-9 minutes (err on the side of under-baking vs over-baking), then remove from oven and gently press a Hershey Kiss into the center of each cookie. Transfer cookies to a cooling rack then let cool completely.
Notes
- I recommend Bob’s Red Mill Gluten Free 1-to1 Baking Flour or King Arthur Gluten Free Measure for Measure Flour for this recipe.
Nutrition
Nutritional values are estimates only. Please read our full nutrition information disclaimer.


So good!!! Really easy to make too!!
I love hearing this, Janice!!
Delicious and easy to make. I will freeze some to share with family at Christmas. Should the rest be refrigerated? I love your step by step instructions. I mixed up a batch of the ginger molasses cookies to bake tomorrow. can’t wait!!!
(Now, have you ever attempted fruitcake?)
thank you
I’m so glad to hear this, JoAnn!! The cookies that aren’t being frozen can sit in an airtight container on the counter. I have yet to tackle fruit cake!! ;)
What could I have done wrong? They’re delicious but they’re flat.
Hi Renee! Hmmm, I haven’t had this feedback before so I can’t say for sure! If your dough is very soft and sticky, and spreading too much in the oven, likely it is too warm. Try placing the dough in the refrigerator for 15-20 minutes on the baking sheet before baking.
I had to bake these much longer than the recipe indicates. I took the first pan out when they just started to crack, but they were too underdone. I put them back in for 5-7 minutes, chocolate and all, and it looks like they are going to be OK.
I’m glad to hear they turned out well, Connie!