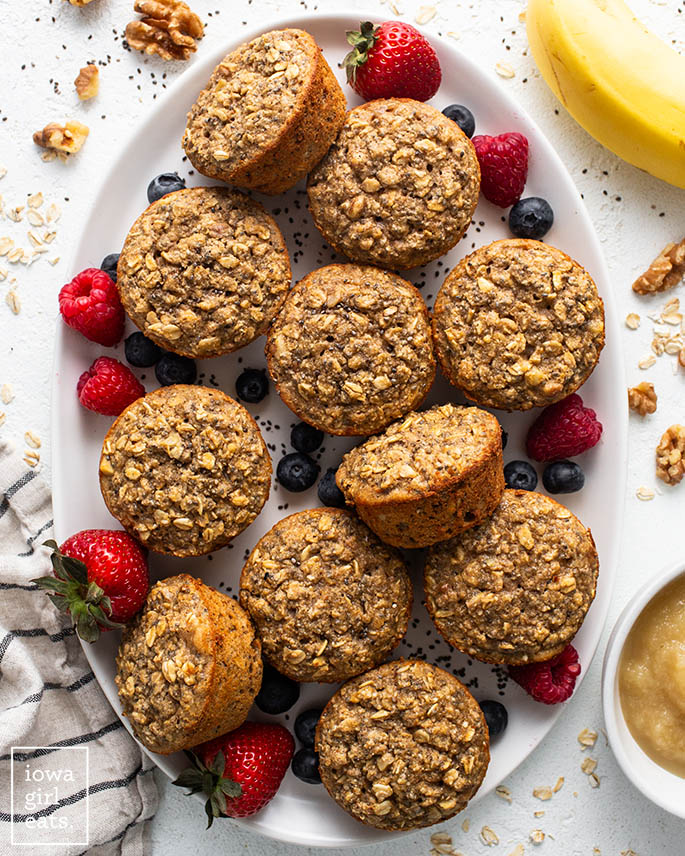
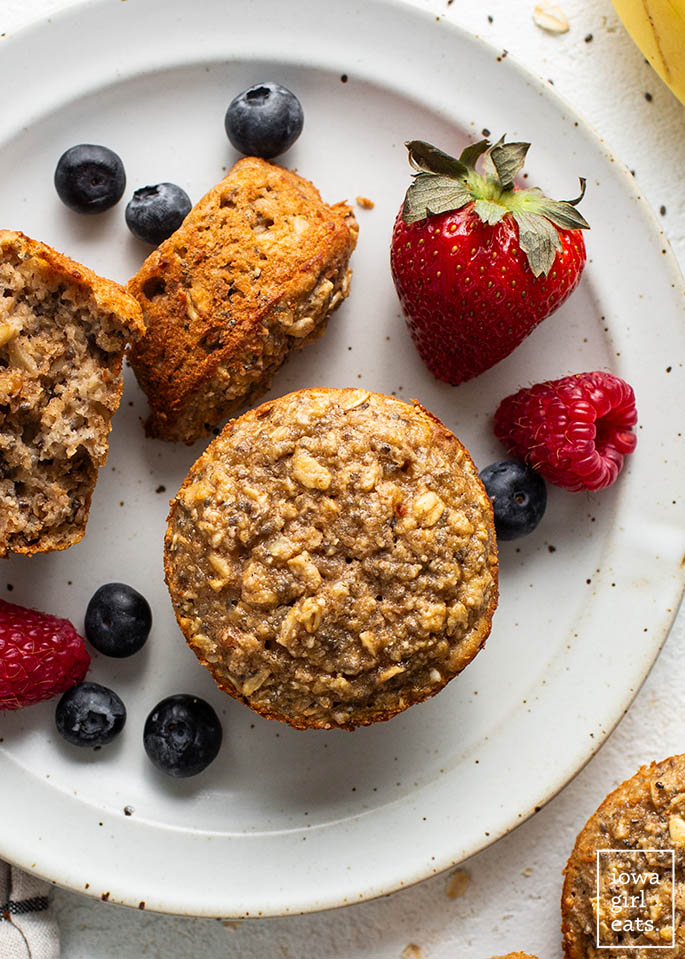
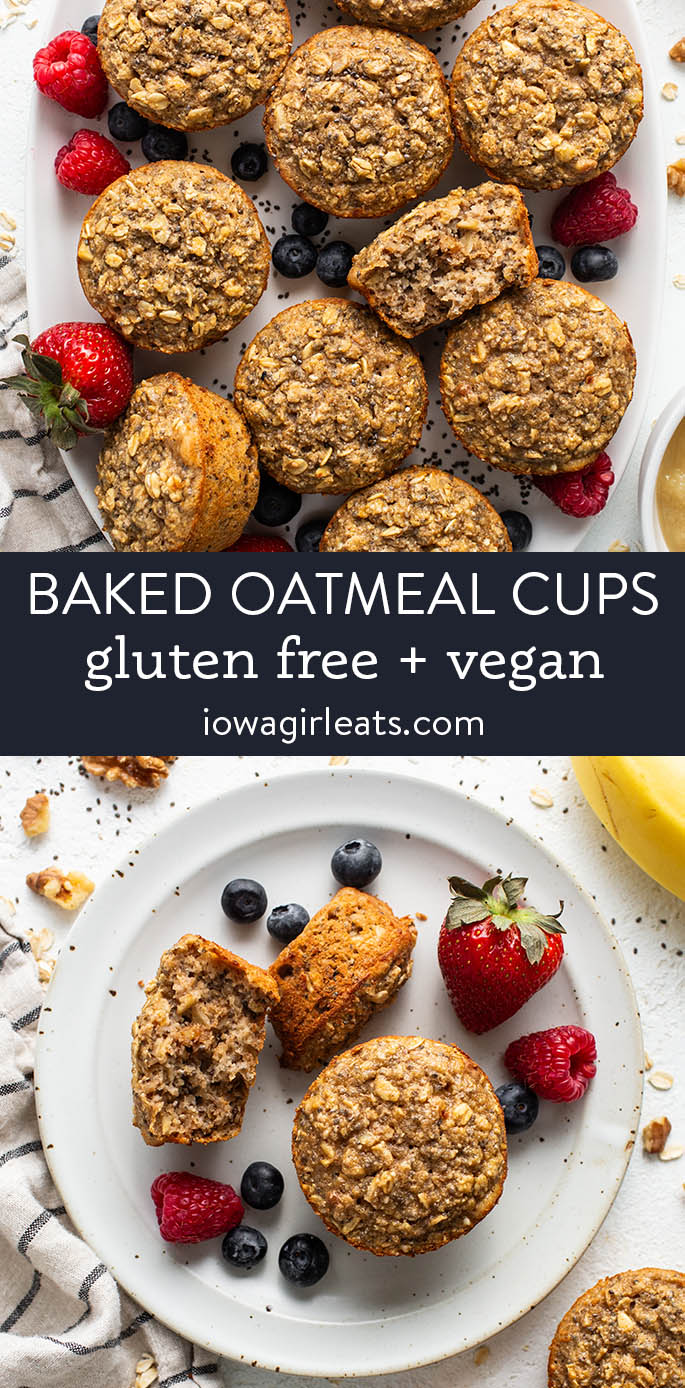
Baked Oatmeal Cups are nutrient-dense, naturally sweetened, gluten free and easily made vegan, too! The perfect healthy breakfast or snack.
“Love these baked oatmeal cups! I’ve made these several times and they’re so tasty – even my two year old loves them.”
When I tell you that time flies when you have little kids, I wish with my whole heart and soul that I was kidding. I swear I was spoon-feeding my oldest child rice cereal in his high chair like two days ago — now he’s double digits and crushing double-patty burgers at our weekly burger night. Then requesting a second dinner an hour or two later.
When I also tell you my wallet is already sweating…!
All that to say, my crew is only getting older and hungrier, and having a batch of Baked Oatmeal Cups on hand in the fridge or freezer is an easy choice to point them to when hunger strikes. They’re a healthy, naturally-sweetened option for breakfast or snack time.
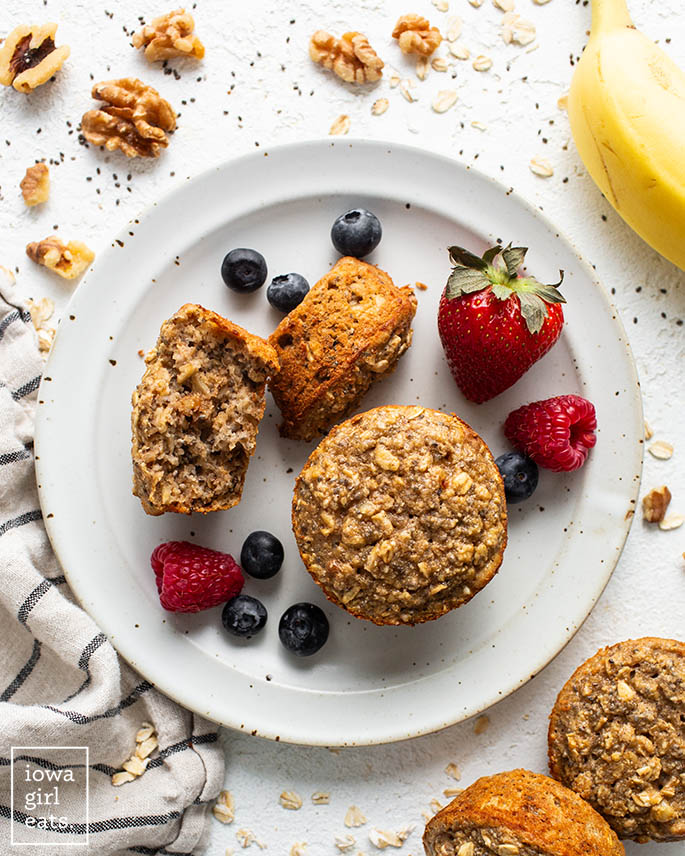
Think a bowl of oatmeal in make-ahead, grab-and-go form. Pair with a piece of fruit or yogurt and you’ve got one heck of a hunger-buster!
Watch How to Make Them
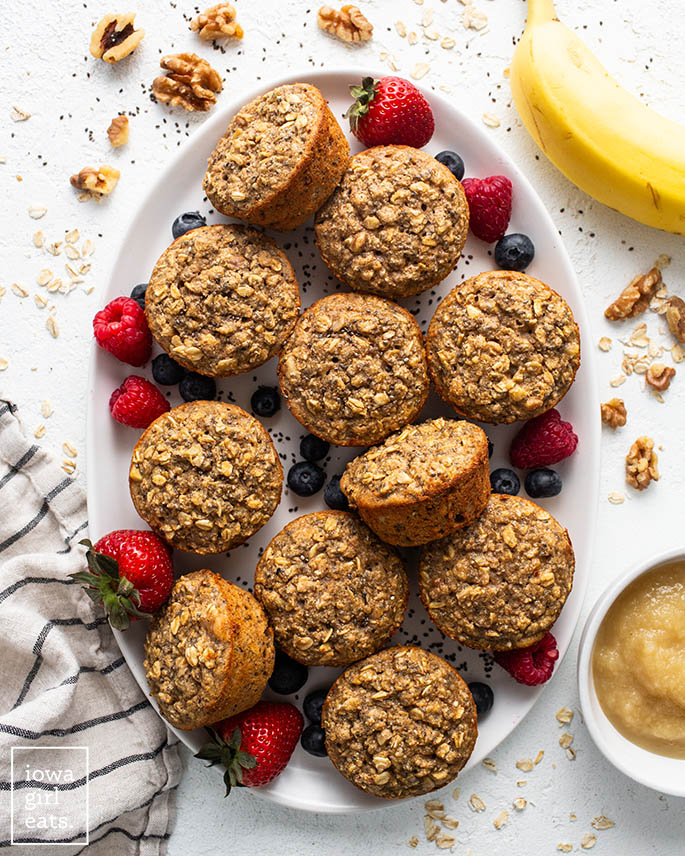
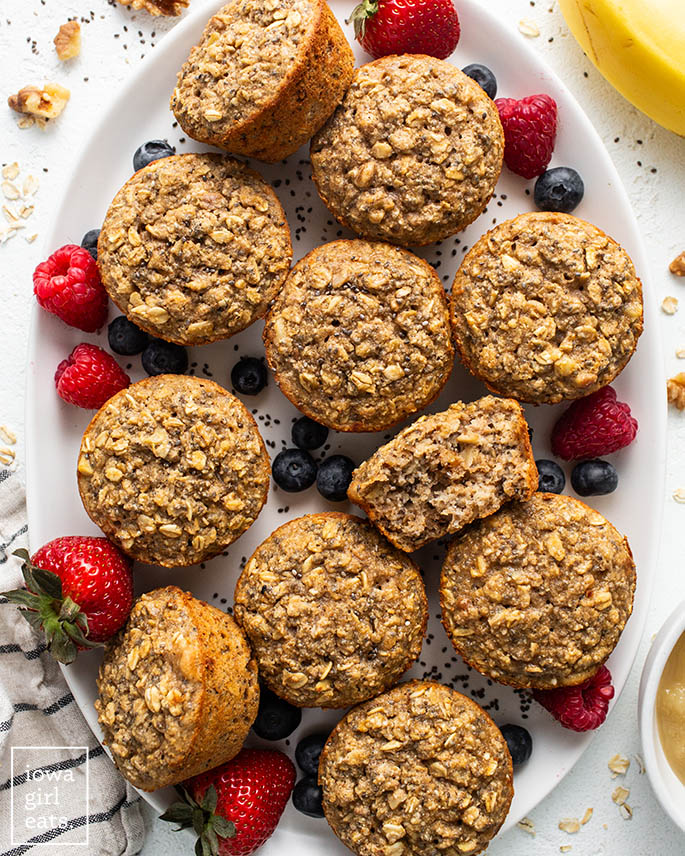
Baked Oatmeal Cups
These oat-based bites are full of good-for-you ingredients that are fridge and pantry staples. Not only are they gluten free, but they’re easy to make vegan too. My daughter has egg and dairy allergies so having a breakfast option, especially, that all three of my kids can eat without modification is a godsend during crazy school mornings.
Even if you don’t have kids, easy Baked Oatmeal Cups are great to keep on hand as a pre or post-workout snack, afternoon pick me up paired with a cup of coffee or tea, or like I said, a grab and go breakfast option to pair with a banana, apple, or yogurt (or whatever)!
Main Ingredients Needed
- Old fashioned oats: a portion of the oats are ground into flour either in a food processor or high powered blender. If you were to try and bake the Baked Oatmeal Cups with all old fashioned oats they’d fall apart easily.
- Nuts: chopped nuts (which are optional) provide crunch and extra protein. I like pecans, but use what you like.
- Chia seeds: add fiber, protein, and nutrients.
- Cinnamon: adds cozy flavor.
- Milk: whatever you have on hand in the fridge is just fine — this isn’t a fussy recipe. I use unsweetened almond milk.
- Unsweetened applesauce: naturally sweetens the Baked Oatmeal Cups, keeps them moist, and cuts down on the amount of oil/fat we need to add to the recipe.
- Maple syrup: again, adds natural (delicious!) sweetness.
- Coconut oil: keeps the oatmeal cups tender and moist. You can use butter instead, if you like.
- Eggs: help to keep the oatmeal cups together.
- Vanilla extract: gives these oatmeal cups a “dessert-esque” flavor and aroma.
A Note on Gluten Free Oats
If you have Celiac Disease or a severe gluten sensitivity, it’s important to look for the term “Purity Protocol Oats” on the package of oats that you’re buying and using in your oat-based recipes.
This indicates that the oats have been grown, transported, and processed in dedicated fields, trucks, and plants to reduce or eliminate the overall risk of cross contamination from gluten-containing grains like wheat, barley, and rye. Oats not grown following the purity protocol method rely on mechanical processing to separate gluten-containing grains from the oats, which is not 100% reliable.
I like GF Harvest Oats!
How to Make GF + Vegan Oatmeal Cups
Gluten free Baked Oatmeal Cups are simple to make vegan using 2 easy swaps:
- Plant-based milk: use a plant-based milk like almond, soy, etc. vs cow’s milk. I use unsweetened almond milk.
- Flax eggs: instead of 2 chicken eggs, use 2 “flax eggs”. That’s 3 Tablespoons ground flaxseed meal stirred together with 6 Tablespoons water, left to sit and thicken for 10 minutes before adding to the batter.
Using the flax eggs vs chicken eggs will result in slightly flatter baked oatmeal cups, and you’ll need to bake them for up to 10 additional minutes, but otherwise they’re pretty much indistinguishable from the non-vegan cups!
Pin this now to find it later
Pin ItBaked Oatmeal Variations
I’ve made Baked Oatmeal Cups and baked oatmeal bars enough times to confidently say this recipe is super flexible and pretty much fool proof. My best tip is to err on the side of over-baking the cups vs under-baking, to avoid dense and gummy insides.
Here are some recipe variations to try:
- Use your favorite nut: I usually go for pecans, but chopped walnuts, almonds, and cashews are all great options inside the oatmeal cups.
- Add fresh fruit. Shred 1 large apple into the batter, or add up to 1 cup blueberries, raspberries, chopped strawberries, or blackberries.
- Swap applesauce for banana: no applesauce on hand? Use 1/2 cup mashed ripe banana instead.
- Add a jammy center: sink ~1/2 Tablespoon of your favorite jam or jelly into the center of each oatmeal cup prior to baking for a sticky-sweet surprise when eating.
- Add chocolate: when in doubt, add chocolate! Feel free to toss 1/2 cup chocolate chips into the batter before baking. I recommend Enjoy Life Dark Chocolate Morsels which are both vegan and gluten free.
Alright, let’s do this!

How to Make Baked Oatmeal Cups
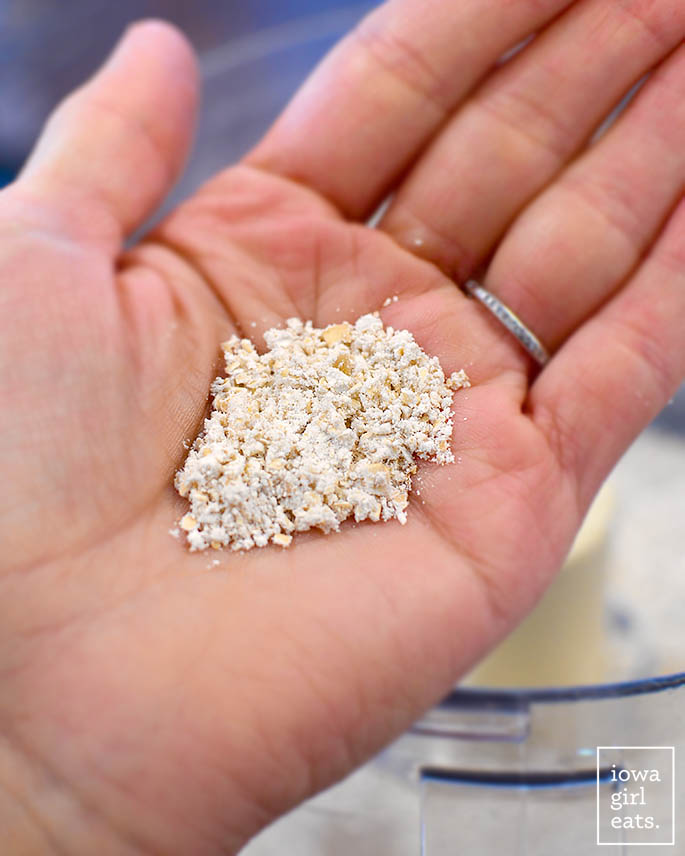
Step 1: Process some of the oats into flour.
Start by processing gluten free old fashioned oats (aka rolled oats) into flour using a food processor or high-powered blender like a Blendtec, Vitamix, or Ninja.
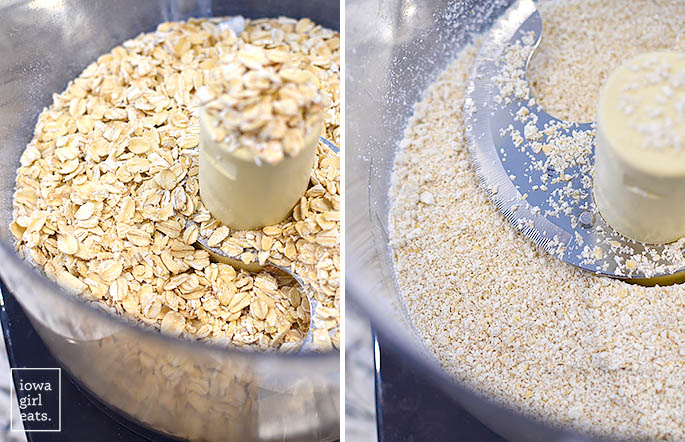
You can see there’s still a little texture to the oat flour, and that’s ok! It doesn’t need to be super smooth like regular flour.
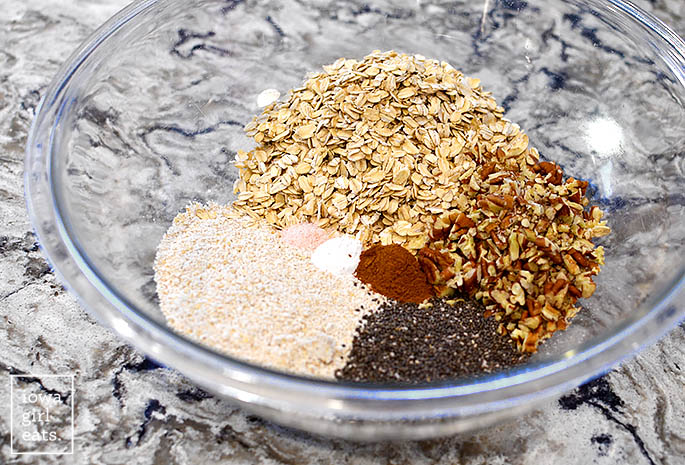
Step 2: Mix up the dry ingredients.
Add the oat flour to a large mixing bowl with more whole old fashioned oats, chopped nuts (these are pecans), chia seeds, cinnamon, baking powder, and salt then whisk to combine.
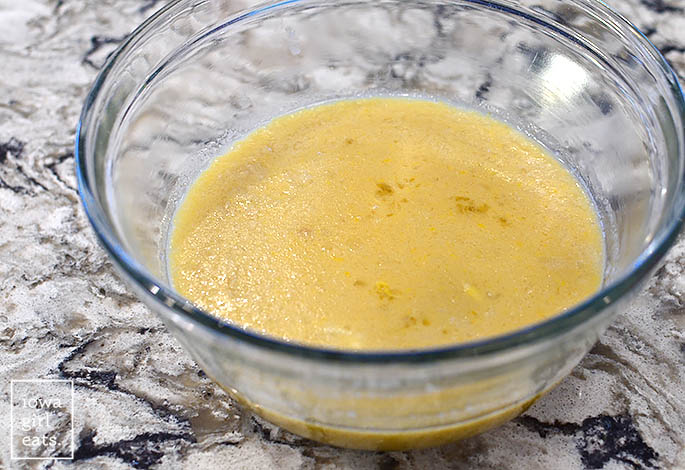
Step 3: Mix up the wet ingredients.
In a separate mixing bowl, add milk, unsweetened applesauce, maple syrup, coconut oil that’s been melted then slightly cooled, eggs or flax eggs, and vanilla extract then whisk to combine.
Recipe Tip
If the coconut oil forms little lumps after whisking with the other wet ingredients, that’s fine! Coconut oil melts at 78 degrees, so it’ll melt in the oven while the oatmeal cups bake.
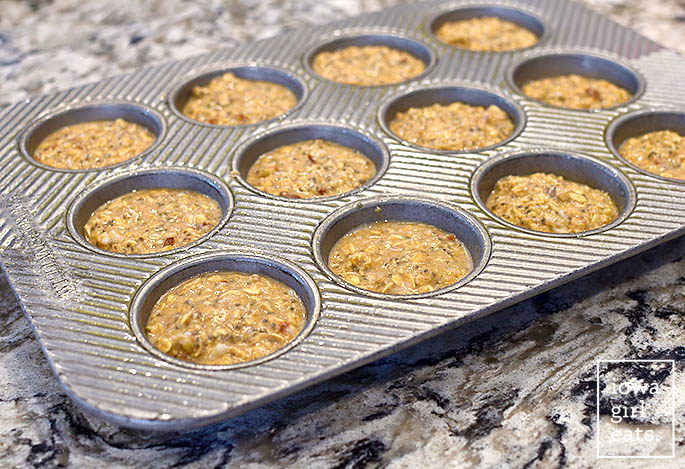
Step 4: Add the wet ingredients to the dry ingredients.
Pour the wet ingredients into the dry ingredients then whisk or stir with a spatula until everything is well combined. Let the batter sit and thicken for 5 minutes or so, which will make it a little easier to scoop into the muffin in.

Step 5: Bake
Which is where we head next! Scoop 1/4 cup batter into each cup of a standard-size muffin tin that’s been sprayed very well with nonstick spray. Bake for 25-30 minutes at 350 degrees or until the oatmeal cups are browned on top and feel firm when you lightly press down on the top of an oatmeal cup with your fingertip.
Recipe Tip
I err on the side of slightly over-baking vs under-baking the oatmeal cups so they don’t turn out dense and gummy. I find the toothpick test doesn’t really work since they’re so textured, and so I rely on pressing on the tops to make sure they feel firm to determine doneness.
Let the baked oatmeal cups sit in the muffin tin for 10 minutes before running a knife along the outside of each cup then popping them out. Place onto a cooling rack to cool completely then devour.
How to Store and Reheat
Baked Oatmeal Cups keep super well in the refrigerator for about a week after baking, or you can pop them into the freezer for longer storage. Here’s how to store and reheat them!
- Store in the fridge: Cool the baked oatmeal cups completely then transfer to an airtight container with a lid. Enjoy cold, or microwave for 20-30 seconds to warm through.
- Store in the freezer: Cool the baked oatmeal cups completely then place in a single layer in a gallon-size Ziplock freezer bag. Remove all the air then seal and freeze flat for up to 3 months. Thaw the oatmeal cups overnight in the fridge or wrap in a paper towel and microwave frozen for 1 minute at 50% power, or until warmed through.
However you eat them, I hope you love every single crumb of these healthy easy Baked Oatmeal Cups. Enjoy!
More Make-Ahead Breakfast Ideas
- Gluten Free Quiche
- Gluten Free Pumpkin Muffins
- Gluten Free Breakfast Bombs
- Mini Egg Bites
- Maple-Pumpkin Oatmeal Bars
- Crock Pot Breakfast Casserole
- High-Protein Overnight Oats
- Make-Ahead Breakfast Bowls

Equipment
Ingredients
- 2-1/2 cups certified gluten free old fashioned oats, divided
- 1/2 cup chopped nuts, optional
- 2 Tablespoons chia seeds
- 1 teaspoon cinnamon
- 1/2 teaspoon baking powder
- 1/4 teaspoon salt
- 1 cup milk, any kind
- 1/2 cup unsweetened applesauce
- 1/2 cup pure maple syrup, not pancake syrup
- 1/4 cup coconut oil, melted then slightly cooled
- 2 large eggs, see notes for vegan option
- 2 teaspoons vanilla extract
Directions
- Preheat the oven to 350 degrees then spray a 12 cup muffin tin very well with nonstick spray and set aside.
- Add 1 cup oats to a food processor or high powered blender (like a Blendtec, Vitamix, or Ninja) then process until they’ve turned into flour. Add the flour to a large mixing bowl then add remaining 1-1/2 cups oats, nuts (if using), chia seeds, cinnamon, baking powder, and salt then whisk to combine.
- To a medium-size mixing bowl add the milk, applesauce, maple syrup, coconut oil, eggs (or flax eggs) and vanilla then whisk to combine — if some of the coconut oil clumps up, that’s ok — it will melt in the oven. Pour the wet ingredients into the dry ingredients then fold with a spatula to combine.
- Let the batter sit and thicken for 5 minutes then scoop 1/4 cup into each of the prepared muffin cups. Bake for 25-30 minutes or until the edges of the oatmeal cups are browned and the centers have set, rotating the pan 180 degrees halfway through baking. Err on the side of overbaking vs underbaking. Let the oatmeal cups sit in the muffin tin for 10 minutes before running a knife along the outside of each cup and removing to a cooling rack to cool completely.
- Store leftover Baked Oatmeal Cups in an airtight container in the refrigerator for up to 5 days then eat chilled, or microwave for 20-30 seconds or until warmed through.
Notes
- To make this recipe vegan: use plant-based milk and swap the eggs for 2 flaxseed eggs (3 Tablespoons ground flaxseed meal + 6 Tablespoons water stirred together then left to sit for 10 minutes) and increase the baking time to 30-35 minutes.
- To freeze: cool the oatmeal cups completely then place in a single layer in a gallon-size Ziplock freezer bag. Remove all the air then seal and freeze flat. Thaw the oatmeal cups overnight in the fridge, or wrap in a paper towel and microwave frozen for 1 minute at 50% power, or until warmed through.
Nutrition
Nutritional values are estimates only. Please read our full nutrition information disclaimer.
Photos by Ashley McLaughlin


Can we add blueberries or choc chips to the recipe?
Yes! Check out the text under the headline “Baked Oatmeal Variations” for guidance.
Had these for dessert tonight abd they were welcome surprise. Very flavorful and light with crispy edges. Not overly sweet but very enjoyable. They were very tender but stayed together well. These would be a great treat for my nieces and nephew ( ages 2-10) where I wouldn’t have to worry about loading them up on sugar or artificial ingredients. Great recipe. Definitely going on repeat.
I’m so, so happy this recipe was a hit all the way around, Chris! Thank you so much for your feedback and recipe rating. I hope your nieces and nephews love them too. :)
I just discovered your recipes – can’t wait to try them. Can I use 1 minute oats to make your baked oatmeal cups?
I’m so glad you’re here, Leona! I think minute/instant oats would create very dense oatmeal cups, but you could always halve the recipe to give it a try!
These turned out great, perfect for a quick breakfast! Worried they would come out dry, but not at all. I used oat milk and subbed avocado oil for the coconut oil just because that’s what I had. Such a great recipe, thank you!
I’m thrilled these exceeded your expectations, Maggie! Thank you so much for your feedback and recipe rating!
Love these baked oatmeal cups! I’ve made these several times and they’re so tasty – even my two year old loves them.
Question – how long would you cook them if you were making mini muffins? TIA!
I’m so happy to hear that, Carissa!! I haven’t tried baking them in a mini muffin pan, but I imagine 12-15 minutes??
These are delicious, and they smelled so good as they were baking! I shared some with my neighbors and they enjoyed them too!
I’m so happy to hear this, Nancy — about as happy as I imagine your neighbors were to receive some!! Thanks for sharing, and for your recipe rating!