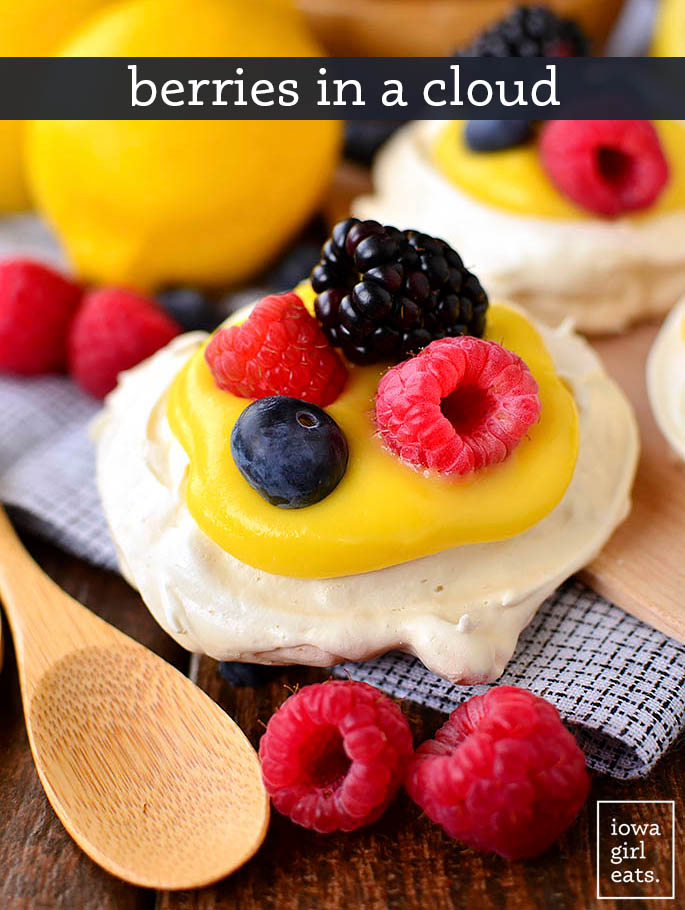
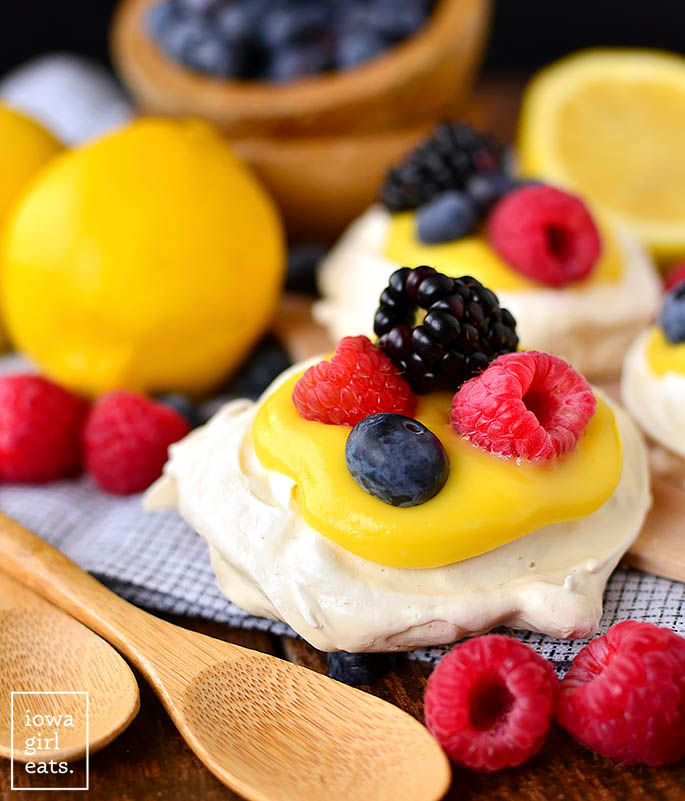
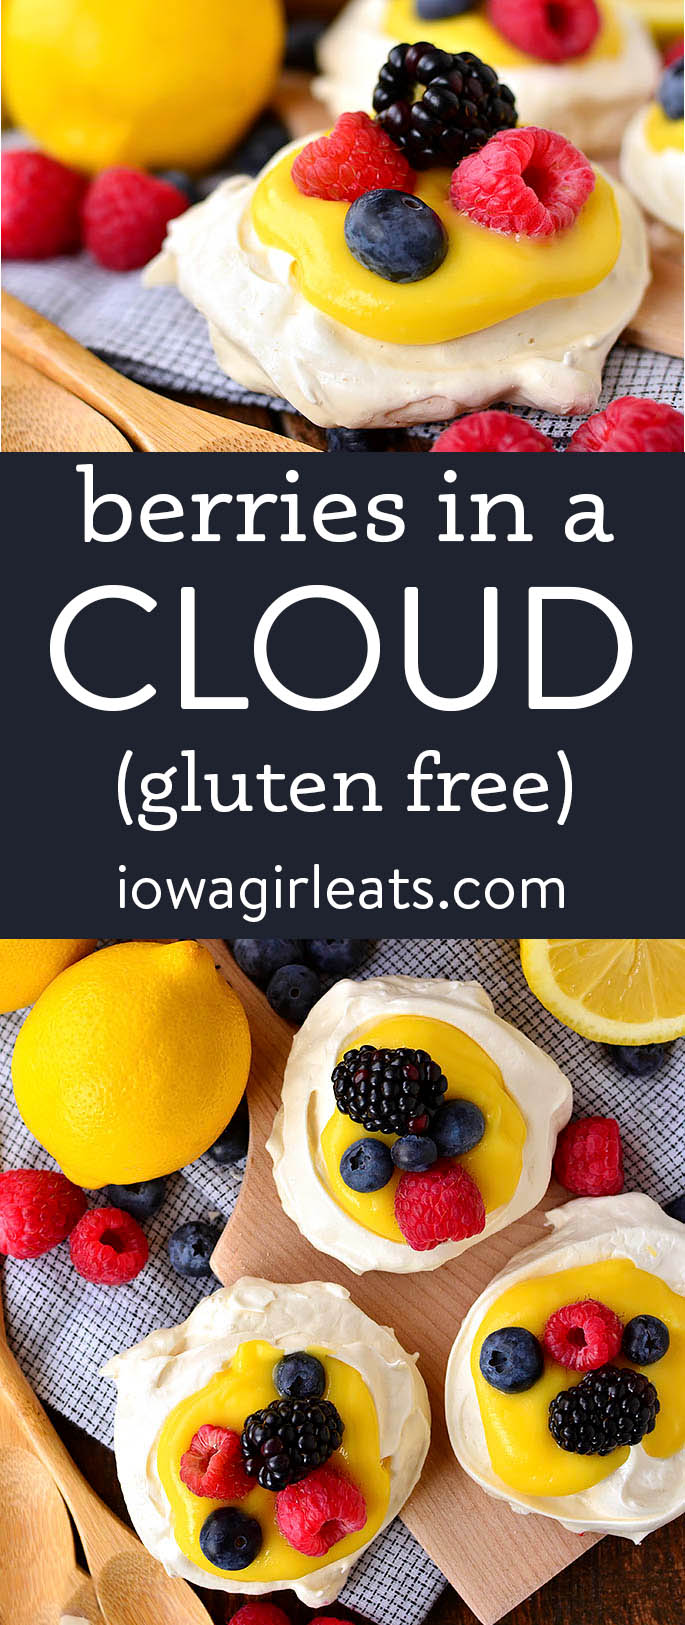
Berries in a Cloud are crispy homemade meringue shells topped with lemon curd and fresh berries. Sweet, impressive, and gluten free!
I recently learned that “gluten-free desserts made with normal ingredients” is one of the top searched phrases online when it comes to living a gluten-free lifestyle, and I’ve never related to anything harder.
Forget gluten free flours that all bake and cook differently from one another, or even mixing up your own blend.
Berries in a Cloud is a dream of a gluten free dessert recipe. No flour needed, rather, just a handful of everyday ingredients. Plus they’re as delicious to devour as they are to look at. Each lemon curd and berry-topped cloud looks like a work of art!
Easy Gluten Free Dessert Recipe
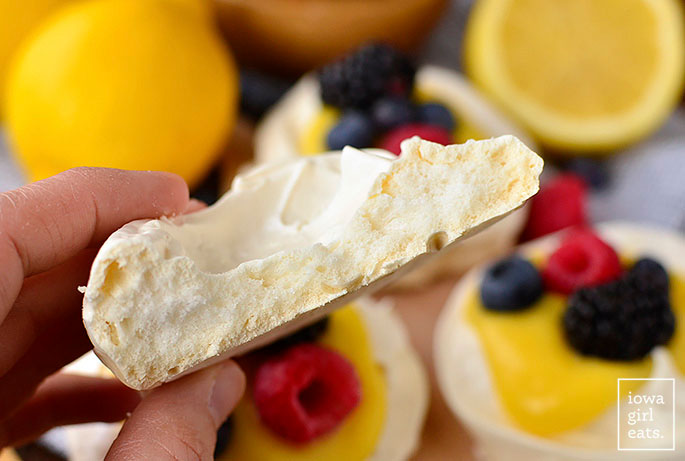
The Berries in a Cloud base — the “cloud” if you will — is a meringue cup which is simply egg whites whipped with sugar, vanilla, and a pinch of salt until fluffy like a cloud. Dollop the mixture onto a baking sheet then bake low and slow for a couple hours and you’ll have meringue that’s crispy on the outside and cotton candy-esque on the inside.
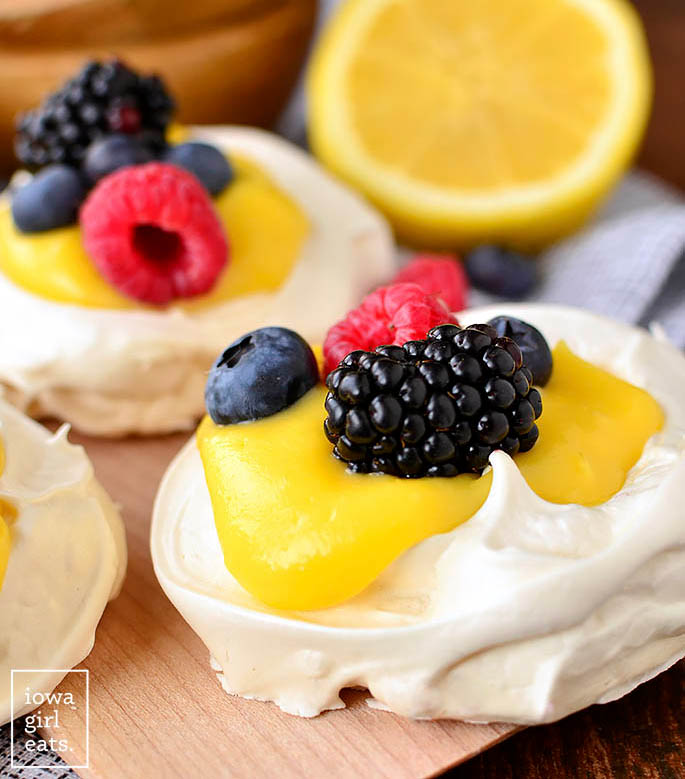
Each meringue cup is filled with chilled, Homemade Lemon Curd which itself is made from just 6 ingredients plus salt.
Top with fresh berries and you’ve got an elegant, gluten free, grain free dessert that’s perfect for any occasion. They’re especially a hit at baby and bridal showers, in my experience!
Now, I must tell you that Berries in a Cloud is not my creation. A good friend’s Mom (hi Becky!) used to make us girls this dessert for special occasions in high school, though she’d make a giant meringue, called a pavlova, instead of small cups then fill the center with whippy chocolate mousse before adding fresh berries.
I KNOW.
Whether you fill each fluffy “cloud” with chocolate mousse or homemade lemon curd, you’ll be delighted with the outcome!
Try my Gluten Free Angel Food Cake
How to Make Berries in a Cloud
Step 1: Make the meringues.
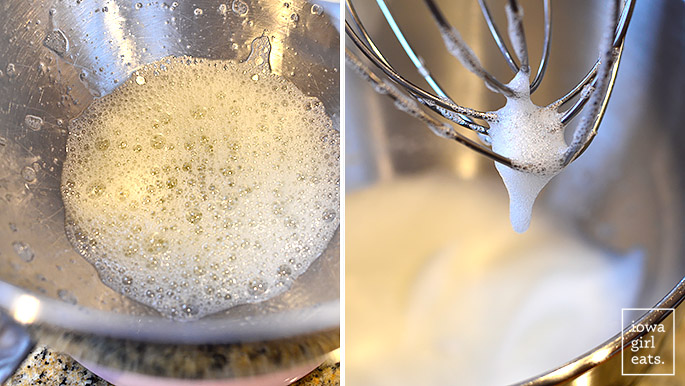
Start by adding 2 large egg whites to a large glass bowl if you’re using a handheld mixer, or to the bowl of an electric mixer, then let them come to room temperature for about 30 minutes. Fit the mixer with the whisk attachment then whip on medium-high speed until the egg whites are foamy, about 30 seconds.
Add a pinch of salt then continue whipping until soft peaks form – that is, the egg whites fall right back over themselves after pulling up with the whisk – another 30 seconds.
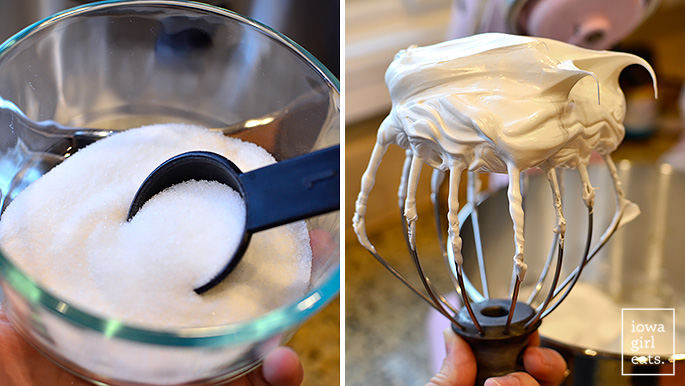
With the speed still set to medium-high, add 1/2 cup sugar 1 Tablespoon at a time, whipping for 30-45 seconds before adding the next Tablespoon. The goal here is to let the sugar dissolve completely before adding another Tablespoon.
After all the sugar has been added, scrape down the sides of the bowl then continue whipping until the meringue is glossy and completely smooth. Test this by rubbing a dollop of meringue between your fingertips. If you can still feel sugar granules, keep whipping.
Last step is to whip in 1/2 teaspoon vanilla.
Step 3: Bake the meringues.
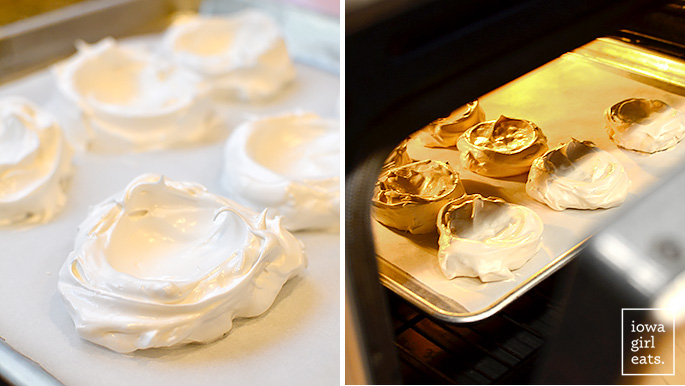
Using 2 spoons, scoop the meringue onto a parchment paper-lined half sheet pan to form 8 mounds then use the back of the spoon to create a divot in the centers. The meringues will puff slightly during baking so leave at least an inch between them.
- Pro tip: place a dollop of meringue between the sheet pan and parchment paper in the corners so it stays in place!
Bake for 1-1/2 to 2 hours at 200 degrees, rotating the pan halfway through, or until the meringues are dry on the outside and pull away from the parchment paper without sticking. The meringues should NOT be golden brown, rather they will be a super light champagne color.
Turn the oven OFF then prop the door open slightly and let the meringues cool inside for 1-2 hours before storing in an airtight container at room temperature. You can make these 1-2 days ahead of time.
The result? A crispy exterior with a chewy, cotton candy interior. You will be amazed and so proud of yourself for pulling these meringues off!
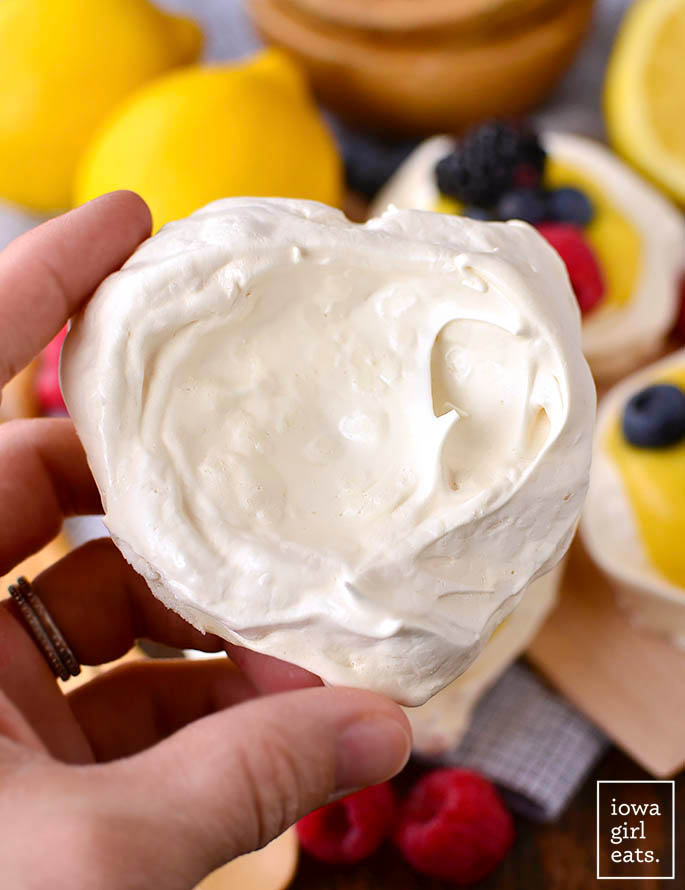
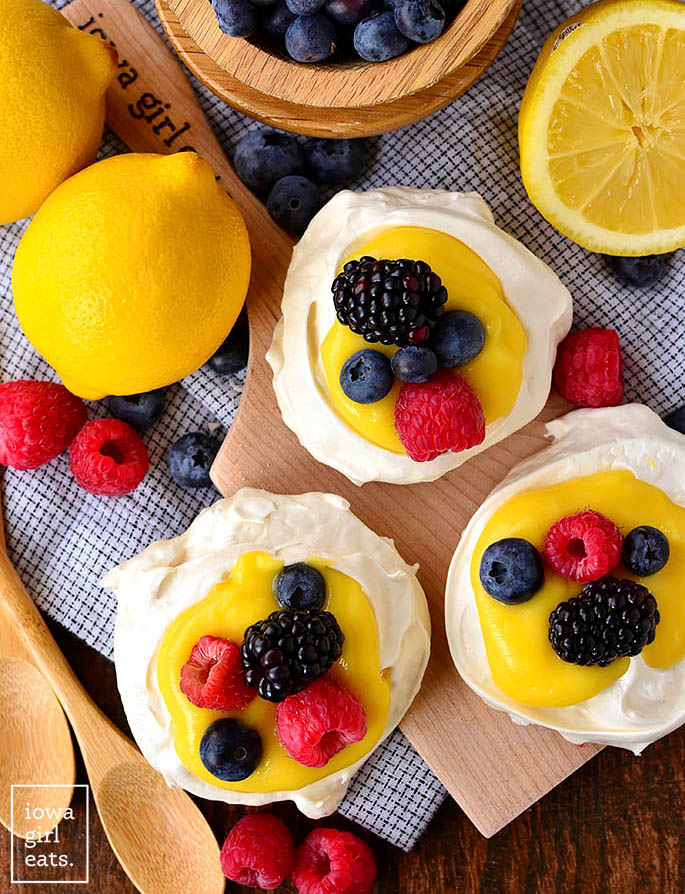
When you’re ready to serve, plate the meringue cups then fill with chilled, homemade lemon curd and fresh berries – blackberries, blueberries, and raspberries really pop against the bright yellow curd.
I hope you LOVE this easy yet elegant spring dessert recipe (made with normal ingredients). ;) Enjoy!
More Fresh Dessert Recipes
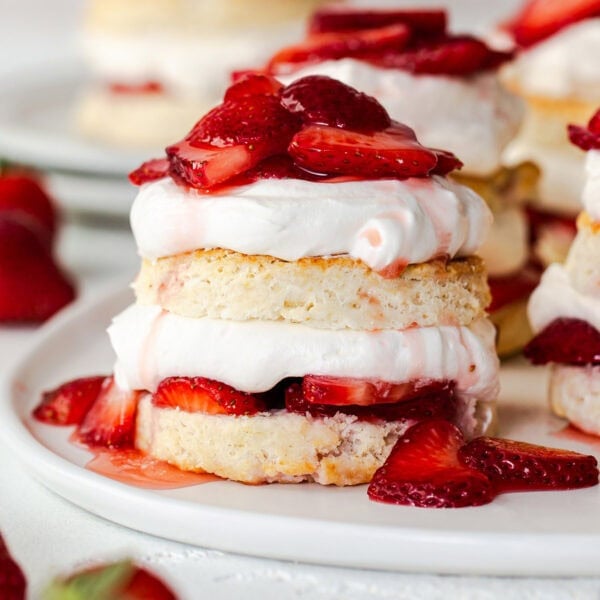
- Gluten Free Strawberry Shortcake
- Gluten Free Peach Crisp
- Gluten Free Blueberry Pie Bars
- Gluten Free Lemon Curd
- Triple Berry Crumb Bars
- Lemon Blueberry Icebox Cake
- Strawberry Shortcake Icebox Cake
- Best Ever Fruit Dip
- Gluten Free Angel Food Cake
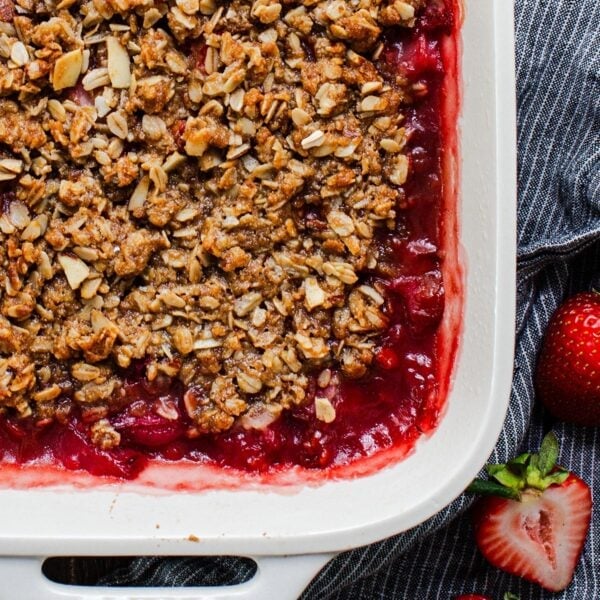
- Strawberry Rhubarb Crisp

Ingredients
- 1 recipe Homemade Lemon Curd
- Fresh berries, for serving
For the Meringue Cups:
- 2 large egg whites
- pinch of salt
- 1/2 cup sugar
- 1/2 teaspoon vanilla
Directions
For the Meringue Cups:
- Preheat oven to 200 degrees then line a half sheet pan with parchment paper and set aside. Add egg whites to a large glass bowl if using a hand-held mixer, or the bowl of an electric mixer, then let come to room temperature for 30 minutes.
- Fit your mixer with the whisk attachment then whip the egg whites on medium-high speed until foamy, 30 seconds. Add salt then continue whipping until soft peaks form (i.e. the egg whites fall over onto themselves after pulling the whisk up) another 30 seconds.
- Turn mixer back to medium-high speed then add 1 Tablespoon sugar at a time, whipping for 30-45 seconds before adding the next Tablespoon — don’t rush it! Once all the sugar has been added, scrape down the sides of the bowl then continue whipping until stiff, shiny peaks form and the meringue is smooth when you rub a dollop between your fingertips. If you can still feel a bit of grittiness from the sugar, continue whipping until the meringue is smooth. Add vanilla then whip to combine.
- Using two spoons, scoop the meringue into 8 mounds on the prepared baking sheet then use the back of the spoon to make an indentation in the center. The meringues will puff slightly so leave at least 1” between mounds. Bake for 1-1/2 to 2 hours, rotating the pan halfway through, or until the meringues are completely dry on the outside and pull back from the parchment paper without sticking. The meringues should NOT be golden brown, rather they will be a super light champagne color.
- Turn the oven OFF then crack the oven door open and let the meringues sit and cool inside for 2 hours. If making a day ahead of time, cool the meringues completely then cover tightly and store at room temperature.
For serving:
- Fill the meringue cups with prepared lemon curd then top with fresh berries and serve.
Nutrition
Nutritional values are estimates only. Please read our full nutrition information disclaimer.


I made the Meringue shells and then topped each with lemon curd (jarred), homemade rhubarb sauce and cool whip – delicious! The original recipe would also be amazing but I was using what I had and my rhubarb was ready for the picking. Everyone raved about these!
That sounds fabulous, Sue!! Love that you were really able to make these your own – the rhubarb sauce sounds excellent!
love having another flourless dessert to work with, this is very nice, thank you!
How beautiful! How appetizing! How simple this dessert is prepared!
I am infinitely grateful to you for sharing this culinary masterpiece with us!
I am sure that my children will be wildly delighted with this delicious food!
love these, thank you, serving size is perfect and haven’t had lemon curd in a long time
The serving size is SO perfect – not too little, not too much. I hope you love it, Sabrina!
This dessert looks amazing!! I love lemon curd.
Thank you, Celia! Me too – I hope you’ll give it a try!
This looks amazing. Lemon curd and meringue are two of my favorite things … cannot wait to combine them into one heavenly cookie. Obviously depends on the size of the clouds, but approx. how many cookies did one recipe make during your test runs?
Oh you will just love them together! The meringue recipe makes enough for 8 “clouds”.
This looks so good and I love that it’s dairy free!
Yes, Ma’am! I hope you love them! :)
Thanks for my dessert for a birthday celebration this Sunday!!
Hope you loved it!!