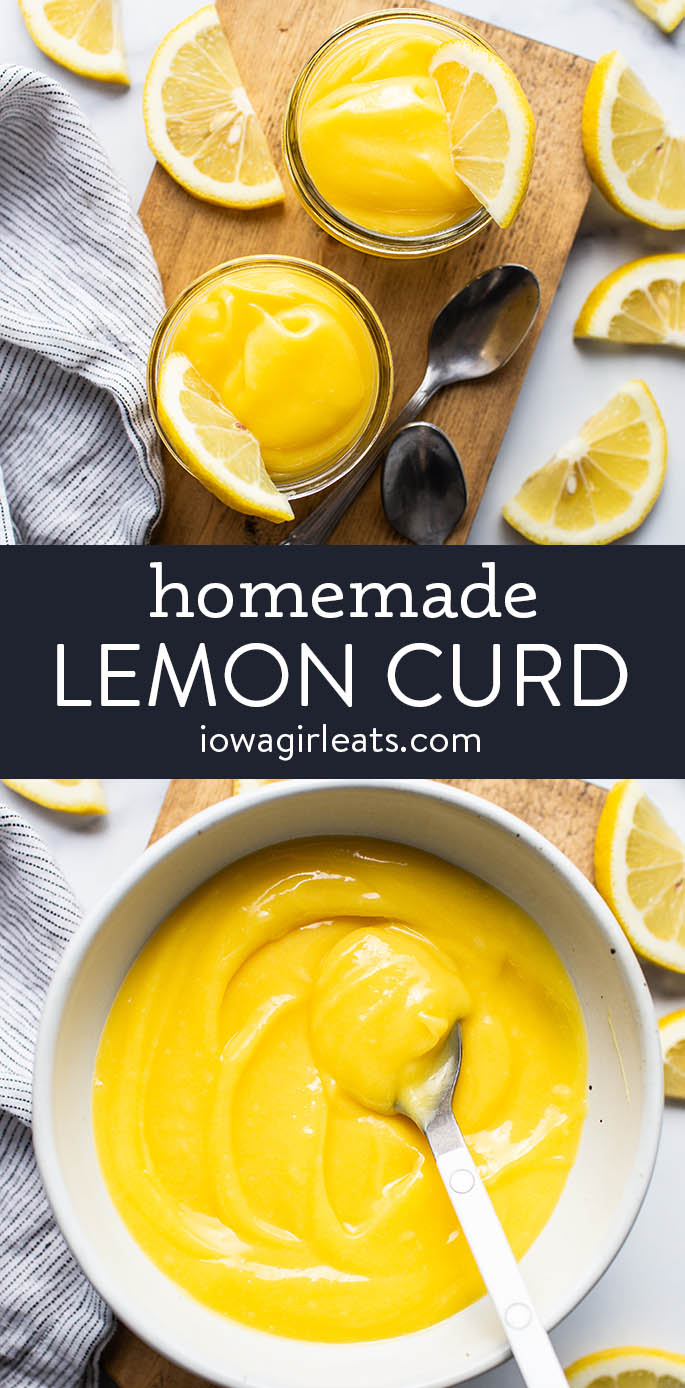
Homemade Lemon Curd is easy, elegant, versatile, and made with 5 everyday ingredients. This gorgeous lemon dessert is sunshine on a spoon!

“…this recipe is clearly written and easy to follow and the results are great. I can’t wait to eat on a slice of toast for breakfast. Thank you!”
I took my kids to a movie last weekend and had to choose between chocolate or sweet & sour candies in the kids popcorn combo I ordered each of us. #foreveryoung It only took me a moment to confidently answer “sweet and sour“.
I’m a chocolate lover through and through, but when given the choice I’m going puckery-sweet, every time.
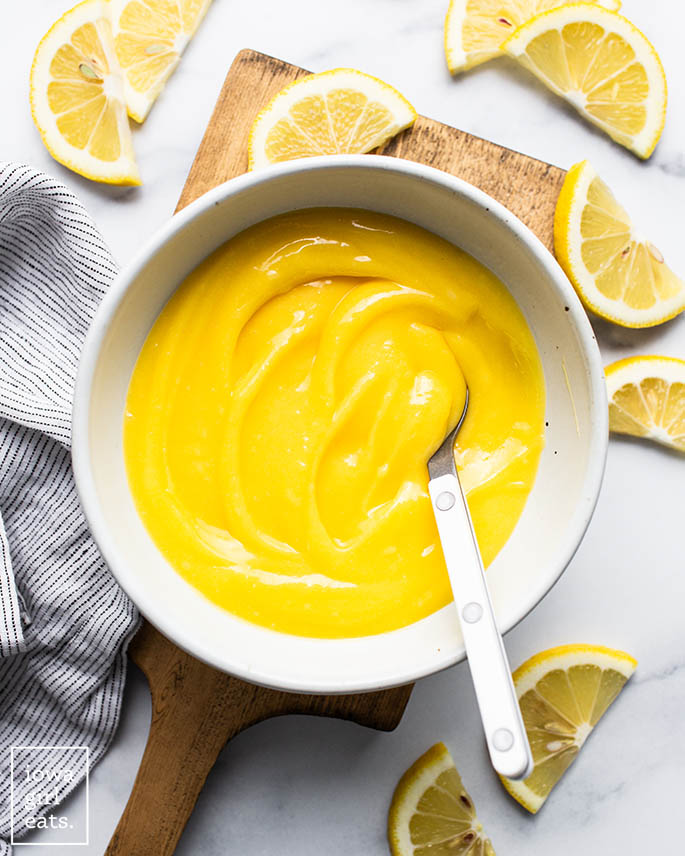
It should come as no surprise then, that one of my very favorite desserts is Homemade Lemon Curd. This 5 ingredient lemon dessert recipe as bright, creamy, sweet, tart, and smooth as it looks. I call it “sunshine on a spoon” for obvious reasons!
What is Lemon Curd?
If I were to explain what Lemon Curd is to my kids, I’d tell them its lemon pudding. If I were to tell YOU, I’d add that lemon curd is an egg-thickened dessert recipe that’s historically served as a spread. It’s intensely lemony, smooth and creamy, and the perfect balance of sweet and tart.
In a word? IRRESISTIBLE.
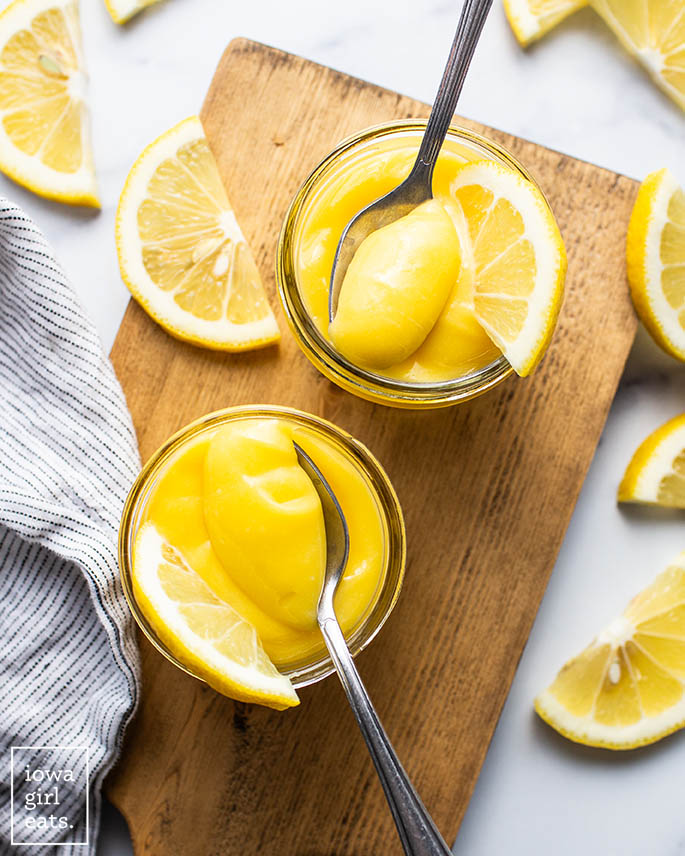
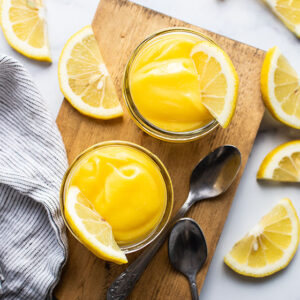
Whether you dollop it on top of shortbread, a scone, or toast, scoop it up with graham crackers or, my personal favorite — eat it straight off a spoon — Lemon Curd is easy, elegant, versatile, and make ahead. Prepare then store for up to 2 weeks in the fridge, or freeze for up to 3 months.
Lemon Curd is the perfect spring dessert to serve at wedding and baby showers, for Easter, and every occasion in between. It’s gluten free, grain free, and can easily be made dairy-free, too!
Ingredients Needed
Raid your fridge, pantry, and lemon tree (if you’ve got one!) for the five, everyday ingredients you’ll need to make homemade lemon curd:
- Eggs: both whole eggs plus additional egg yolks provide structure to the lemon curd, as well as a sunshine-yellow color.
- Lemon juice: use fresh lemon juice vs bottled. You’ll need 4-5 lemons for this recipe.
- Granulated sugar: for that craveable, sweet-tart flavor combo.
- Salt: just a dash to balance the recipe.
- Cold butter: gives the lemon curd a glossy finish. Many lemon curd recipes call for 6+ Tablespoons of butter, though I think 4 Tablespoons provides richness while preserving a mouthwatering, puckery-lemon flavor. Feel free to use vegan butter if you need it.
- Vanilla extract: just a drizzle rounds out the flavor of the lemon curd and cuts out any sharp sourness.
Lemon Curd Uses
Like I said, Lemon Curd is an extremely versatile lemon dessert. Here’s how you can enjoy it:
- As “pudding” — scoop into a cup then eat with a spoon!
- Spoon into mini pavlovas to make Berries in a Cloud.
- Mix with vanilla ice cream.
- Mix with whipped cream to create whippy Lemon Fruit Dip.
- Layer with whipped cream, blueberries, and graham crackers to create Lemon Blueberry Icebox Cake.
- Dollop on top of gluten free pancakes or waffles with fresh berries.
- Make no-bake dessert cups with lemon curd, crushed graham crackers, whipped cream, and fresh berries.
- Dip into with graham crackers or shortbread cookies.
- Layer with cubed Gluten Free Angel Food Cake and fresh berries in mason jars.
Top Tips
I’ve made this recipe countless times over the years and have amassed a few key tips. Here’s what you need to know!
- Keep the heat low: the base of Lemon Curd is eggs, so to avoid scrambling them keep the heat on the stovetop low / medium-low while cooking the lemon curd.
- Use fresh lemon juice: do yourself a huge favor and use fresh lemons. Since there’s only 5 ingredients, and one of the main ones is lemon, you’ll want to use fresh vs bottled.
- Don’t skip straining: be sure to pass the lemon curd through a fine mesh sieve after cooking to catch any bits of egg. This ensures a silky smooth texture.
- Keep stirring: this is a recipe you won’t want to walk away from while cooking. Stir the lemon curd slowly yet constantly with a whisk until it’s thickened and cooked through.
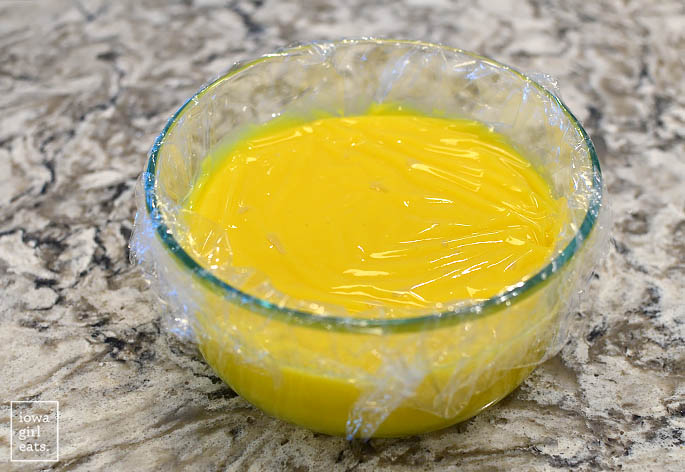
- Cover with plastic wrap: place a piece of plastic wrap directly over the surface of the lemon curd (vs the container you pour it into) to avoid a skin from forming on top as it cools.
Ok, ready to dive into these bowls of sunshine?!
Try Gluten Free Lemon Bars!
How to Make Homemade Lemon Curd
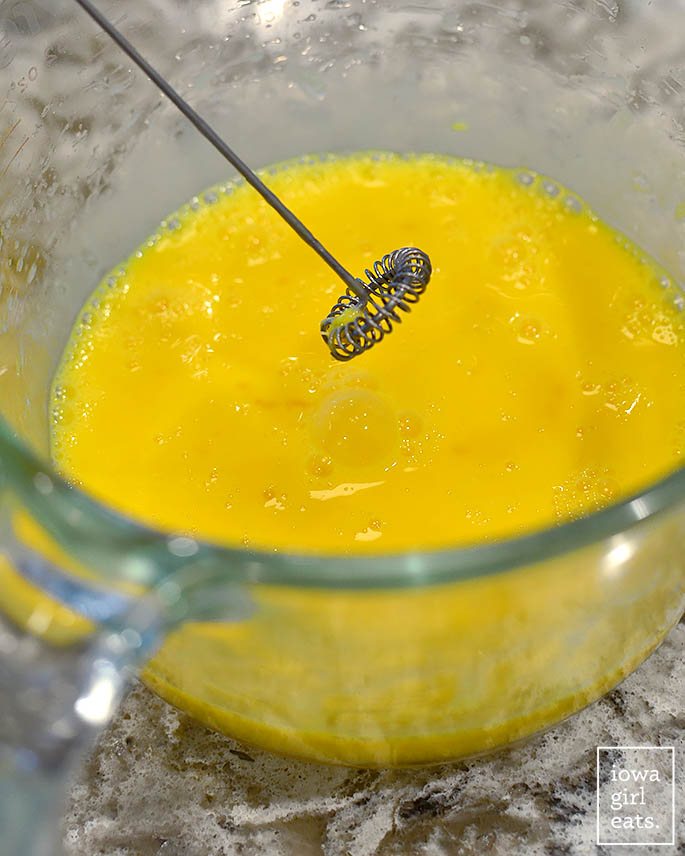
Step 1: Whisk the eggs.
To a bowl, preferably with a lip for easy pouring, add 3 large eggs plus 4 large egg yolks then whisk vigorously until smooth and set aside. I like to use a milk frother to ensure the eggs are as smooth as possible.
Step 2: Heat lemon juice, sugar, and salt.
In a small or medium-sized heavy-bottomed saucepan, add fresh lemon juice, granulated sugar, and a pinch of salt then whisk to combine. Heat over medium-heat until the sugar has dissolved, 2-3 minutes.
Recipe Tip
you’ll know the sugar has dissolved when the mixture becomes clear with a tinge of yellow, on account of the lemon juice.

Can I use bottled lemon juice?
Because lemon is such a prominent flavor and ingredient in Lemon Curd, I do not recommend using pre-juiced / bottled lemon juice.
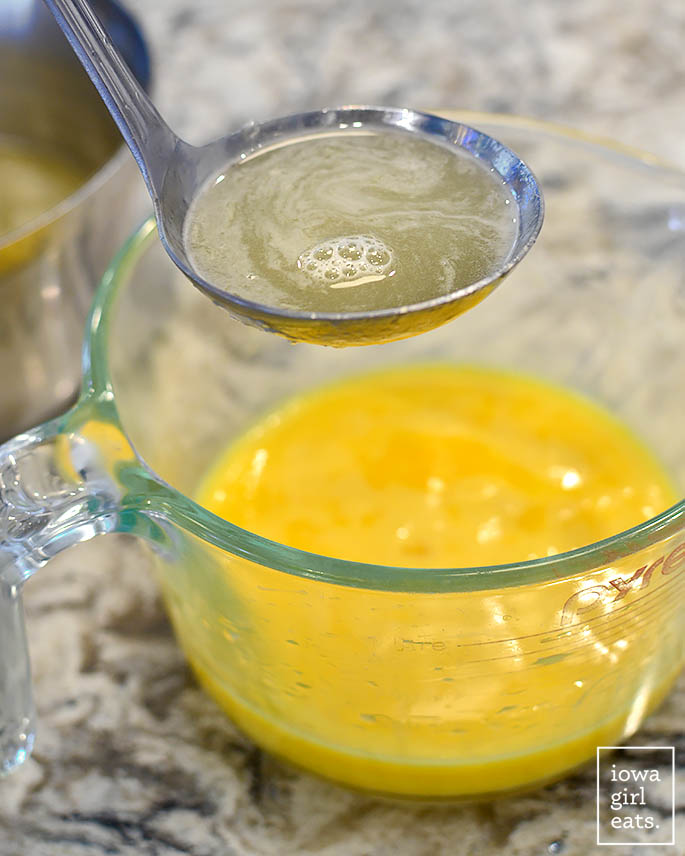
Step 3: Temper the eggs.
Next, temper the eggs. This means, add a portion of the hot lemon-sugar mixture to the cold eggs while whisking vigorously to bring the temperature of the eggs up. This way they won’t scramble while cooking the lemon curd on the stove.
Remove the pan from the stove then slowly stream ~3/4 cup of the lemon-sugar mixture into the eggs while whisking vigorously. It’s fine if the egg mixture foams up while whisking.
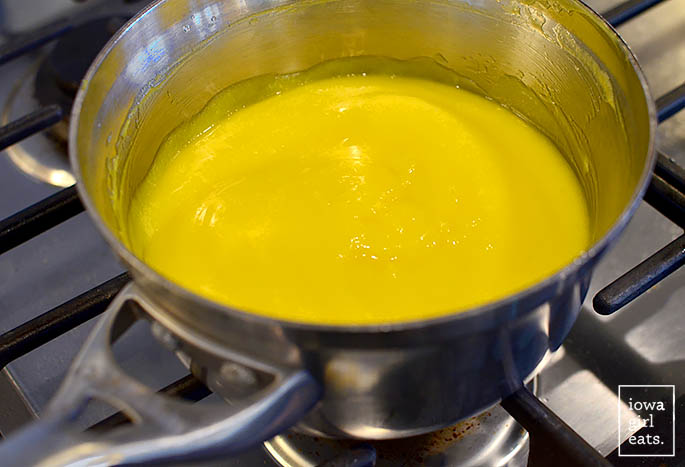
Step 4: Add the tempered eggs to the pan.
Turn the heat down to medium-low then place the pan with the remaining lemon-sugar mixture back onto the stove. Slowly stream the egg mixture into the pan while whisking vigorously. Again, it’s fine if the egg mixture foams — the bubbles will go down.
Recipe Tip
Be sure to slowly stream the egg mixture into the pan vs pour it all in at once.
Cook while whisking continuously for 4-5 minutes or until the lemon curd has thickened. It will thicken all of the sudden near the end. If you’d like to take a temperature, the lemon curd should be between 175-180 degrees when done.
Why is my Lemon Curd runny?
The Lemon Curd will be runny when hot and will thicken as it cools. If the Lemon Curd is still runny after chilling, likely it was not cooked to a hot enough temperature. Lemon Curd should be cooked to between 175 and 180 degrees.
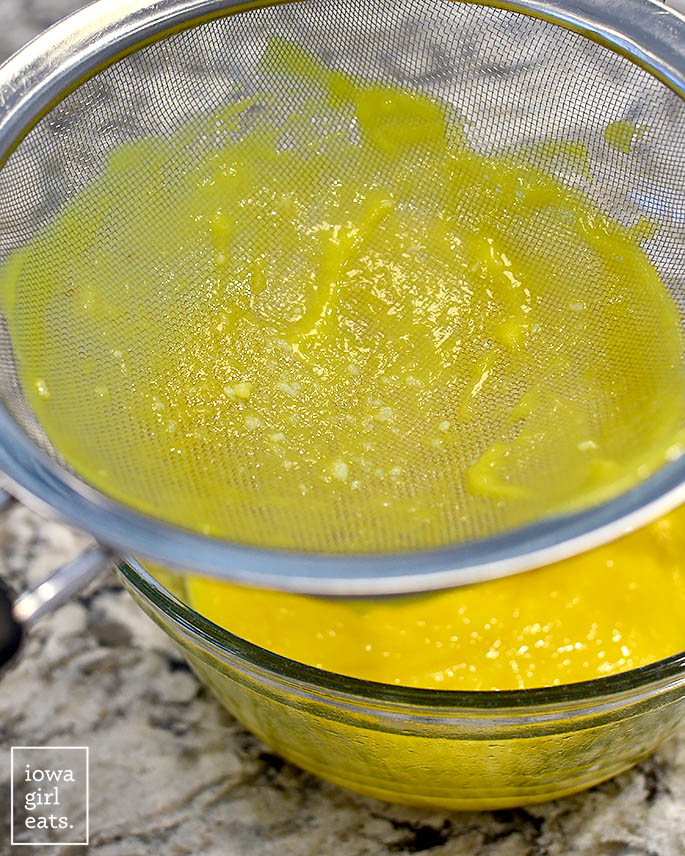
Step 5: Strain the lemon curd.
Use a spatula to scrape the hot lemon curd into a fine mesh sieve set over a glass bowl then press it through the sieve.
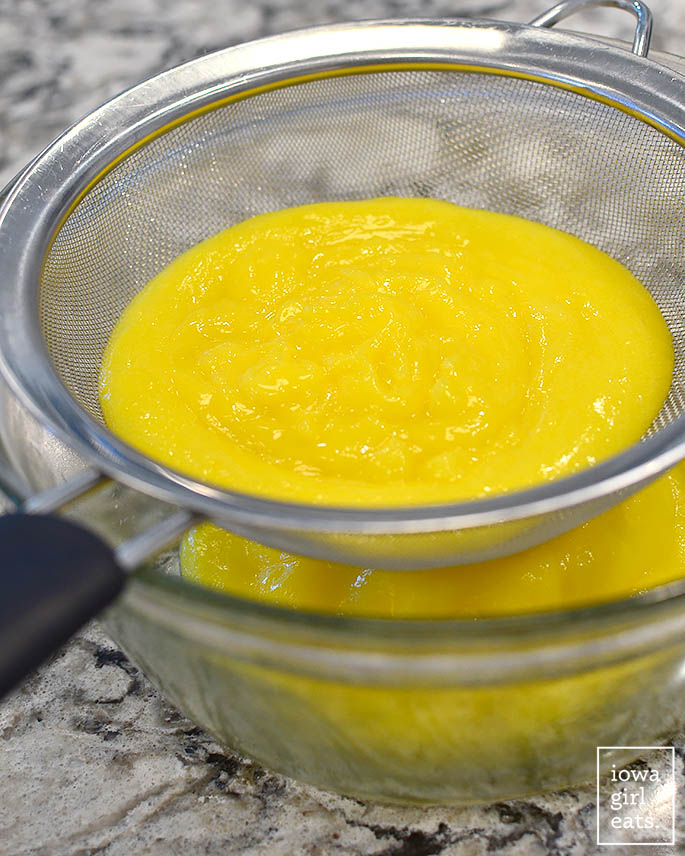
The sieve will catch any bits of cooked eggs to ensure your final lemon curd texture is smooth and creamy.
Why does my Lemon Curd taste eggy?
This is disheartening and I’ve had it happen several times. Lemon Curd can taste eggy when it’s cooked over too high of heat, or over-cooked. Keep the heat at medium-low or low heat while cooking the Lemon Curd to prevent this from happening. I will say that the vanilla extract helps cover any overly eggy flavor if that happens!
Step 6: Stir in butter and vanilla extract.
The final step is to stir in cold butter until melted in two additions, followed by a splash of good vanilla extract.
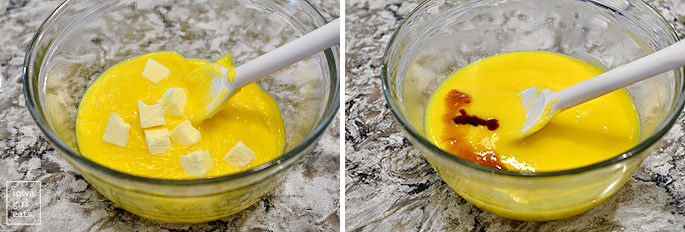
Cover the Lemon Curd with a piece of saran wrap directly over the surface to prevent a skin from forming as it chills. Voila! You have Lemon Curd!
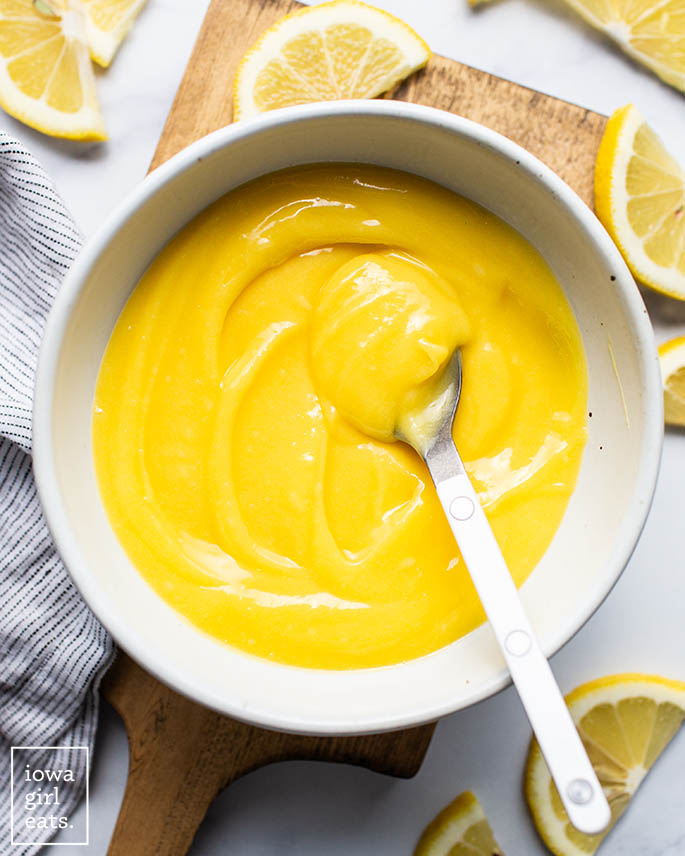
The Lemon Curd is edible warm (and super delicious, actually) but will thicken to it’s final, thick and creamy consistency after a few hours of chilling in the fridge. After that, it’s ready for whatever you have planned (aka, get that spoon ready)! ;)
Storage Tips
- Prepared Lemon Curd will keep in a glass container with an airtight lid for up to 2 weeks in the refrigerator.
- To freeze: chill the Lemon Curd completely then scoop into a gallon size freezer Ziplock bag and freeze flat for up to 3 months. Thaw in the refrigerator.
More Gluten Free Dessert Recipes
- Gluten Free Strawberry Shortcake
- Gluten Free Blueberry Crisp
- Gluten Free S’Mores Bars
- Gluten Free Blueberry Pie Bars
- Gluten Free Lemon Bars
- Gluten Free Angel Food Cake
- Gluten Free Chocolate Chip Cookies
- Gluten Free Triple Berry Crumb Bars
- Gluten Free Chocolate Cupcakes
Equipment
Ingredients
- 3 large eggs
- 4 egg yolks, from 4 large eggs
- 3/4 cup fresh lemon juice, 4-5 lemons
- 3/4 cup granulated sugar
- 1/4 teaspoon salt
- 4 Tablespoons cold butter, cut into cubes
- 1 teaspoon vanilla extract
Directions
- Prepare: place a fine mesh sieve over a medium-size glass bowl then set aside.
- Whisk: to another medium-size glass bowl, preferably one with a lip for easy pouring, add the whole eggs plus egg yolks then vigorously whisk until smooth. I like to use a milk frother to help get the eggs very smooth.
- Heat: to a medium-size, heavy-bottom saucepan add the lemon juice, sugar, and salt. Turn the heat to medium then whisk to combine the ingredients. Cook while slowly whisking until the sugar has dissolved, 2-3 minutes.
- Temper: remove the pan from the heat then slowly stream ~3/4 cup of the hot lemon-sugar mixture (I use a small ladle) into the bowl with the eggs while whisking vigorously. Note: the process of adding hot liquid to cold eggs is called tempering the eggs and it ensures that they don't scramble when they’re added to the remaining hot liquid in the pan.
- Cook: slowly stream the tempered eggs into the saucepan with the remaining lemon-sugar mixture while whisking vigorously. It's ok if the mixture foams while whisking. Place the pan over medium-low heat then whisk continuously until the mixture has thickened, 4-5 minutes — this will happen all of the sudden near the end. Avoid cooking over too high of heat and/or overcooking the lemon curd or it can taste eggy.
- Strain: scrape the lemon curd into the fine mesh sieve over the glass bowl with a spatula then press it through, catching any solid, cooked pieces of egg in the sieve.
- Cool: add half the cold butter then stir until melted. Add the remaining butter then stir until melted. Add the vanilla extract then stir until combined. Place a piece of saran wrap directly on top of the lemon curd to prevent a skin from forming then refrigerate until completely chilled before using, 2-3 hours. The Lemon Curd will thicken once it's completely cool.
- Store: Lemon Curd can be refrigerated for up to 2 weeks, or frozen for up to 3 months. Thaw in the refrigerator.
Notes
- Estimated nutritional information is for entire recipe.
- You will need to use fresh-squeezed lemon juice for this recipe, vs bottled.
- Lemon Curd should be cooked to 175 – 180 degrees as measured by a digital thermometer for optimal thickness/texture.
- Suggested uses:
- As “pudding” — scoop into a cup then eat with a spoon!
- Spoon into mini pavlovas to make Berries in a Cloud.
- Mix with vanilla ice cream.
- Mix with whipped cream to create whippy Lemon Fruit Dip.
- Layer with whipped cream, blueberries, and graham crackers to create Lemon Blueberry Icebox Cake.
- Dollop on top of gluten free pancakes or waffles with fresh berries.
- Make no-bake dessert cups with lemon curd, crushed graham crackers, whipped cream, and fresh berries.
- Dip into with graham crackers or shortbread cookies.
- Layer with cubed Gluten Free Angel Food Cake and fresh berries in mason jars.
Nutrition
Nutritional values are estimates only. Please read our full nutrition information disclaimer.
Photos by Ashley McLaughlin


Lemon curd is one of my favorite things, but I have found the steps for most recipes to be a bit much in the past and i have hesitated to make this from scratch. However, this recipe is clearly written and easy to follow and the results are great. I can’t wait to eat on a slice of toast for breakfast. Thank you!
Ahh, I’m so thrilled you gave this recipe a try, Pam! I truly think the effort is worth the reward and I’m glad you thought so too. Thank you so much for your feedback and recipe rating!