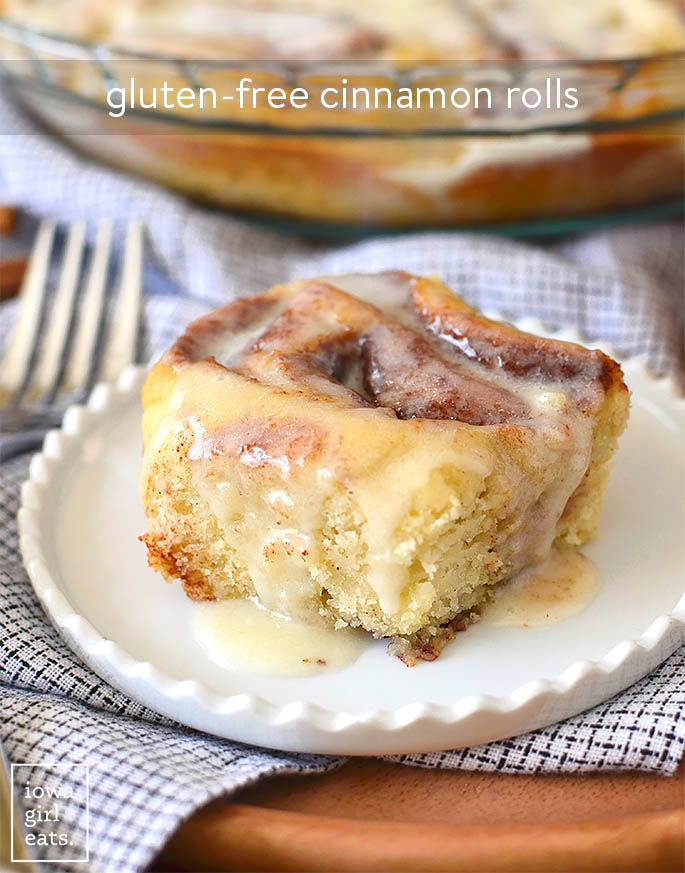
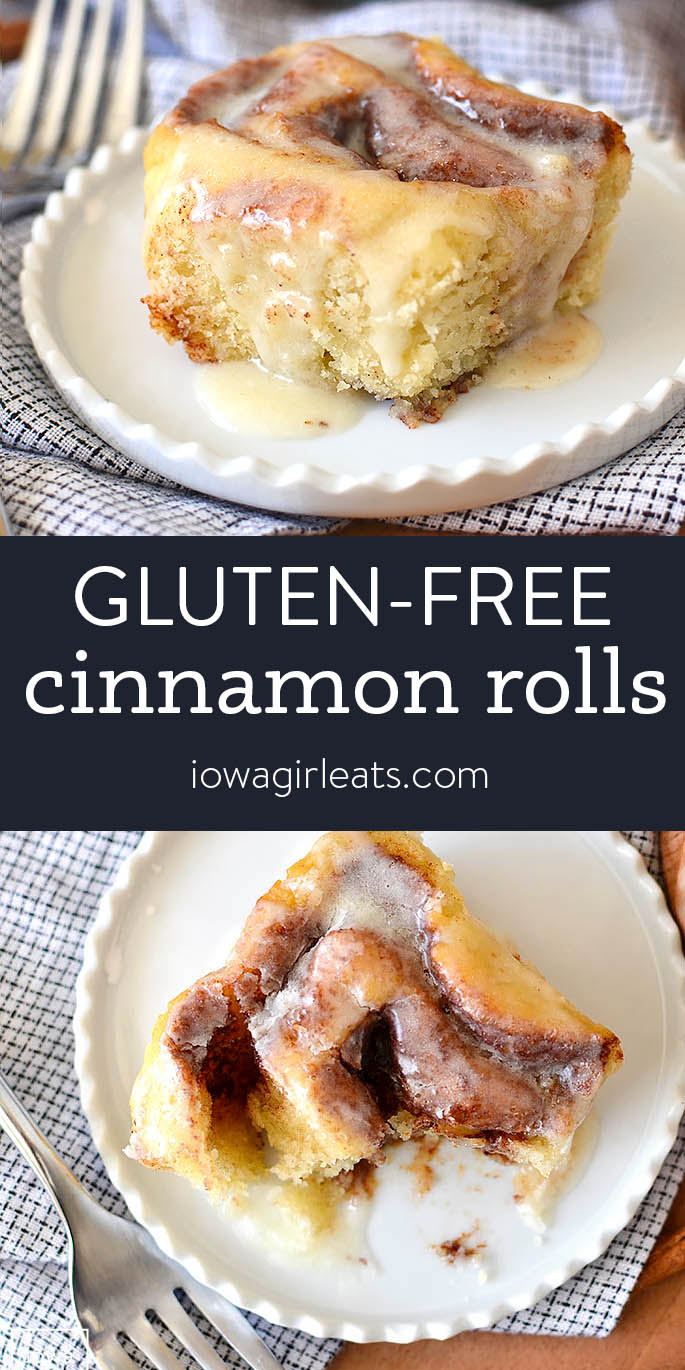
Yes, you can be gluten free and have your cinnamon rolls too! Gluten Free Cinnamon Rolls are sweet, fluffy, and made from pantry staples. Meet your new go to recipe.
“Our family has made these with every Christmas morning breakfast for the last 4-5 years! They are easy and delicious!! Thanks Kristin!”
It’s the post you’ve all been waiting for — Gluten Free Cinnamon Rolls!
If you have to eat gluten free then you know what a bummer it is to miss out on special treats like warm, sweet cinnamon rolls, especially around the holidays. I love cinnamon rolls so much that I once paid a small fortune to overnight a pan of them from a gluten free bakery in San Francisco and they were horrible. Like bricks! These babies are not like bricks!
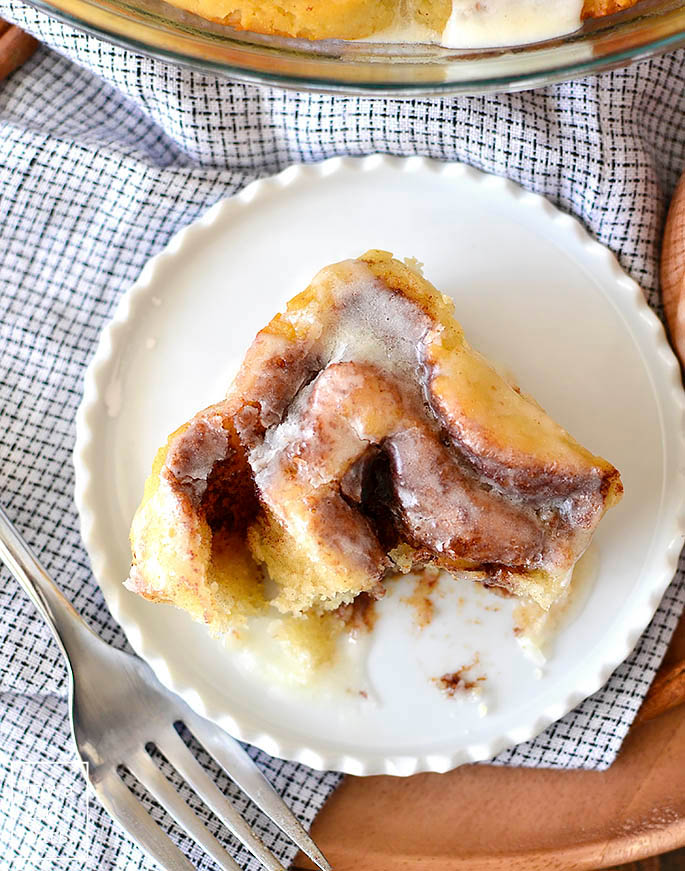
These homemade gluten free cinnamon rolls are tender, cinnamon-kissed, and dripping with the most insane yet easy icing. They are SUCH a treat — I can’t wait for you to sink your teeth into one/half the pan.
Watch How to Make Them
Gluten Free Cinnamon Rolls Made from Pantry Staples
I can’t decide what I love most — the classic, sweet and cinnamon-y taste of these rolls, or the fact that I can eat them any time I want. It’s a win all around! PLUS, for my dairy-free friends, this recipe can easily be made dairy free by using vegan butter instead of regular butter, and unsweetened almond milk instead of cow’s milk.
Best of all, these cinnamon rolls require zero speciality ingredients like milk powder or xanthan gum, etc. to make. All you need is a high-quality gluten free flour blend, plus fridge and pantry staples including an egg, sugar, butter, and milk.
Is making gluten free cinnamon rolls a labor of love? Sure. Are the results TOTALLY worth it? Absolutely! There is no better feeling than being able to enjoy something you loved in your pre-gluten-free life in the here and now.
Main Ingredients Needed
For the Dough:
- Butter: Feel free to use dairy-free / vegan butter instead of regular butter.
- Milk: I’ve used everything from whole milk to unsweetened almond milk in the dough with great results.
- Quick rise instant yeast: for that classic cinnamon roll flavor and texture. I like Red Star, which is gluten free. Be sure your yeast has not expired before using!
- Sugar: to feed the yeast in the dough.
- Egg: to bind the dough together. I’ve used Bob’s Red Mill Powdered Egg Replacer and, while the dough is more on the biscuit side, it works.
- Gluten free baking flour blend: I highly recommend a high quality gluten free flour blend for this recipe, like Cup4Cup. I’ve successfully used Bob’s Red Mill Gluten-Free 1:1 Baking Flour in this recipe for years, though the dough is softer and not as easy to work with compared to a higher quality brand. I’d consider Bob’s a solid cookie recipe flour, while Cup4Cup is a flour blend I turn to when texture really matters.. Whatever blend you use, be sure that it already contains a binder like xanthan gum.
- Baking powder: to help get that nice tall fluffy rise. Again, be sure yours is fresh.
For the Filling:
- Sugar: granulated sugar sweetens up the swirly centers of the rolls.
- Cinnamon: can’t have cinnamon rolls without it!
- Butter: again, this can be regular or plant-based butter. It’s important that it’s very, very soft before using in the filling.
For the Icing:
- Butter: some may say cream cheese is the key to the best cinnamon roll icing, but a butter-based icing is my favorite.
- Powdered sugar: to sweeten the icing.
- Vanilla extract: for cozy flavor.
No Knead Yeast Dough
YES, these cinnamon rolls contain yeast but, before you start sweating, just know that if you can pour something into something else then you can bake with yeast.
There is literally nothing more to it then sprinkling yeast into warm milk. No kneading, no nothing. Plus that yeasty scent, flavor, and rise is a MUST for homemade cinnamon rolls — gluten free or not.
Top Tips for Making Gluten Free Cinnamon Rolls
Baking regular cinnamon rolls from scratch can be intimidating. Baking gluten free cinnamon rolls can be even more so. That said, after making countless batches of these cinnamon rolls, here are my best notes and tips. Be sure to read the post text for additional helpful tips:
- Don’t roll too thin: Otherwise the rolls will fall apart. This is the #1 thing to keep in mind to successfully getting the rolls in the pan.
- Fresh ingredients: Make sure your yeast AND baking powder are fresh and not expired, which will affect the rise of the rolls.
- Soft texture: Don’t be surprised by the texture of the cinnamon roll dough. It’s like a very soft playdough vs pliable and stretchy like regular cinnamon roll dough. Watch the video to see the texture before you get started.
- Don’t stress: If your unbaked rolls look hideous, it’s fine! They’ll taste delicious and are going to be slathered in icing anyway.
- Want to prep ahead? You can prep these gluten free cinnamon rolls a day ahead of time. Please see the recipe card for timing instructions.
- Use our recommendations: Your results may vary if you use a different gluten free flour blend than the ones recommended here.
Alrighty – ready to do this?!
How to Make Gluten Free Cinnamon Rolls
Step 1: Combine the Wet Ingredients
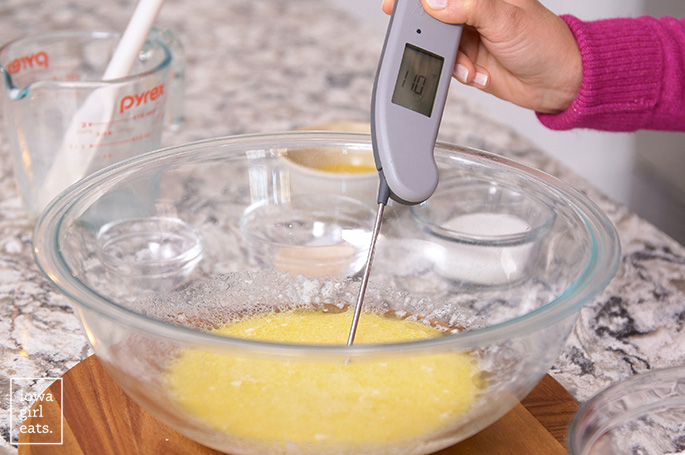
Start by microwaving butter or vegan butter in a large glass bowl until melted. Add milk and sugar then microwave for 45-50 seconds. Stir the mixture then take a temperature using an instant-read thermometer — we’re looking for 110 degrees.
Recipe Tip
Be sure to stir the milk mixture with a spoon or spatula before taking a temperature to avoid hot or cold spots and get an accurate reading.
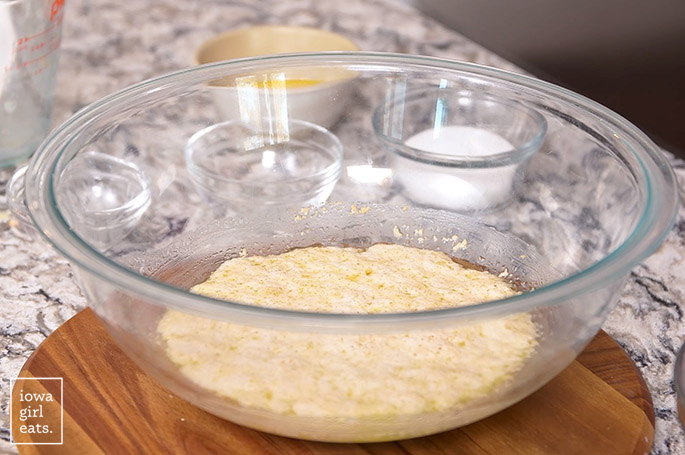
Sprinkle in 1 packet quick rise instant yeast then let the mixture sit until foamy, 8 minutes.

Recipe Tip
If your mixture does not foam, likely your yeast was old and/or your milk mixture was too hot, or not hot enough.
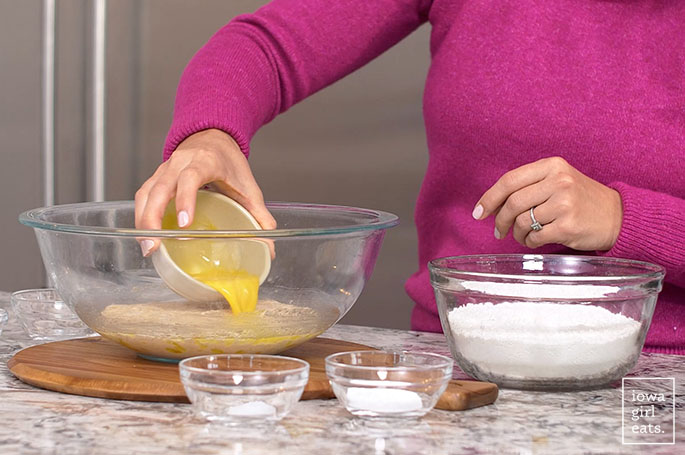
Next add a whisked egg plus more sugar then stir with a spatula to combine.
Can I make these gluten free AND vegan?
Yes! Swap the butter and milk with your favorite plant-based butter and milk. I use Country Crock plant-based butter sticks and unsweetened almond milk, respectively. Replace the egg with Bob’s Powdered Egg Replacer. The texture of the baked rolls will be more biscuit-like, but still delicious.
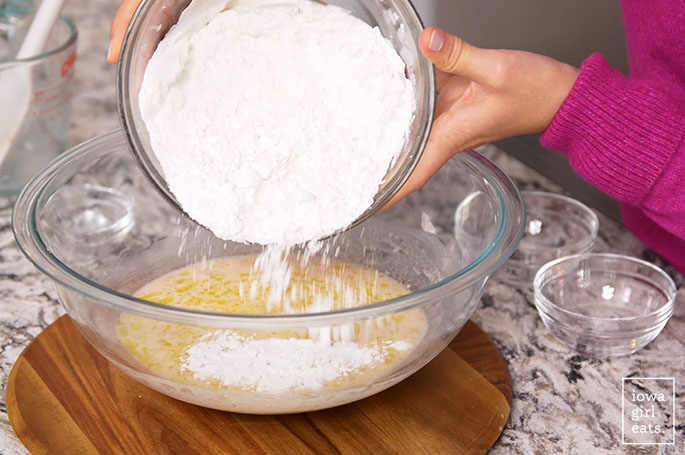
Step 2: Combine the Dry Ingredients
Add the dry ingredients — gluten free baking flour blend, baking powder, and salt — to a medium-size mixing bowl then whisk to combine. Add the dry ingredients to the wet ingredients in two batches, stirring until the flour is just combined before adding the next batch. The dough will be soft like cookie dough but shouldn’t be incredibly sticky.
What’s the best gluten free flour blend to use?
In general, a higher end flour blend like Cup4Cup will be easier to work with compared to the gluten free flour blends I use for cookies, like Bob’s Red Mill Gluten Free 1-to-1 Baking Flour, for example.
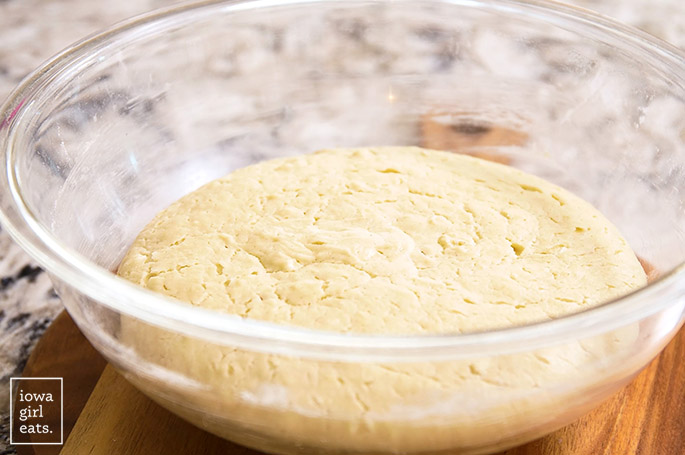
Scrape down the sides of the bowl then cover loosely with a tea towel and place it somewhere warm to let the dough double in size, about 1 hour.
I use my oven’s “bread proof” setting, though in the past I’ve placed the bowl on top of a heating pad set to low. A warm sunny spot works too.
My dough didn’t rise. Can you tell me why?
If you’re dough did not rise, likely your yeast and/or baking powder were expired. Also be sure to place your dough and rolls in a warm enough spot to rise.
Step 3: Spread the Dough Out
Once the dough has doubled in size, scrape it onto a sheet of parchment paper that’s been sprayed with nonstick spray. Spray the dough and your hands with nonstick spray then spread the dough into a rectangle approximately 1/4″ thick — roughly 10×14″.
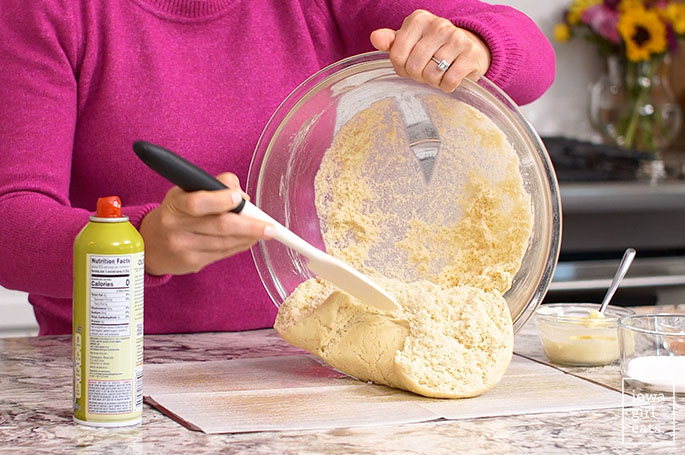
Recipe Tip
The dough will be the consistency of soft play dough, versus stretchy like traditional cinnamon/bread dough. Don’t spread the dough any thinner than 1/4″ thick or it will fall apart when slicing the cinnamon rolls.

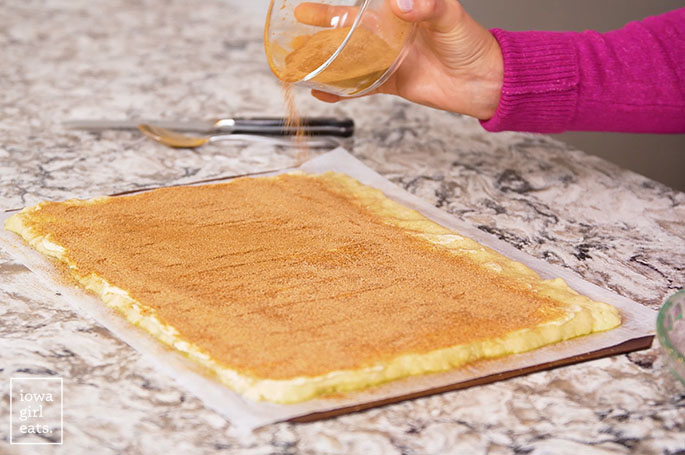
Next, use your fingers or the back of a spoon to spread very soft butter or vegan butter over the dough, leaving 1″ clear on the bottom. Be sure the butter is very soft otherwise you’ll tear through the dough.
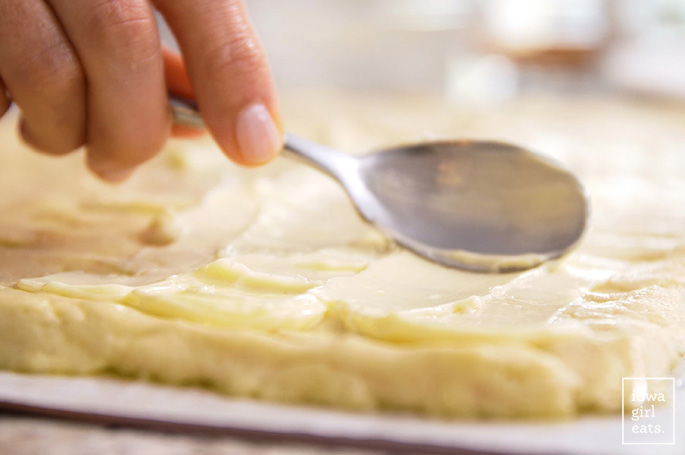
Mix together granulated sugar and cinnamon then sprinkle it evenly on top of the butter, again leaving 1″ of the dough clear at the bottom. This will feel like an excessive amount of cinnamon-sugar, but every drop is necessary!
Can I add nuts?
Sure! Add finely chopped nuts on top of the cinnamon sugar layer before rolling.
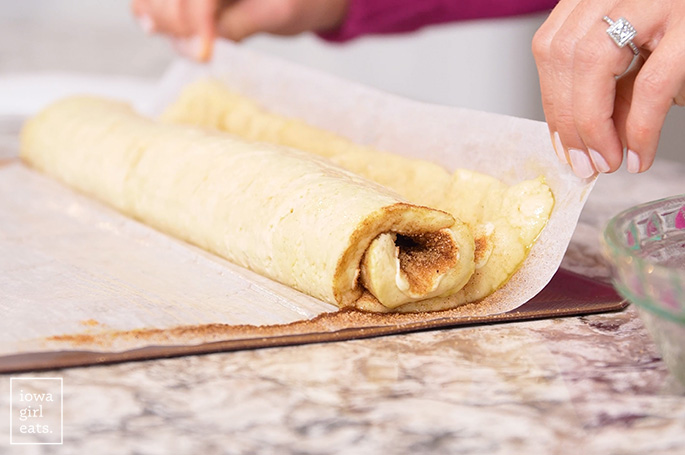
Step 4: Roll then Slice the Dough
Starting at the top, pull the parchment paper down towards you to make the first roll. Continue rolling the dough using the parchment paper instead of your hands until you have one roll left.

At that point, lift the bottom of the parchment paper up so the log sits in the center(ish) of the parchment paper versus the bottom.
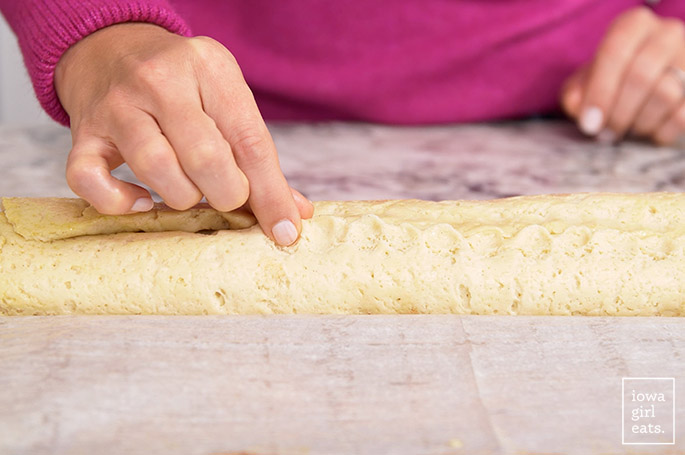
Then, gently pinch the seams together to close.
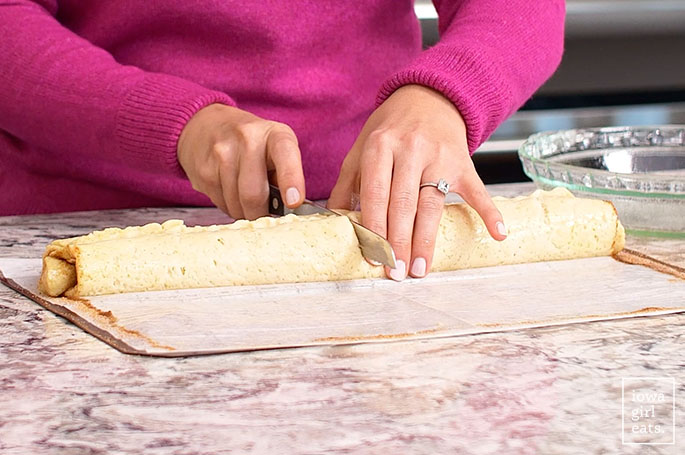
Using a sharp knife, slice the log in half using one confident slice versus a sawing motion. Slice each half in half, then each quarter into thirds to make 12 slices total. Wipe off the knife as necessary with a paper towel.
If the dough seems super wet, it can be helpful to dip your knife in the flour blend in between slices.
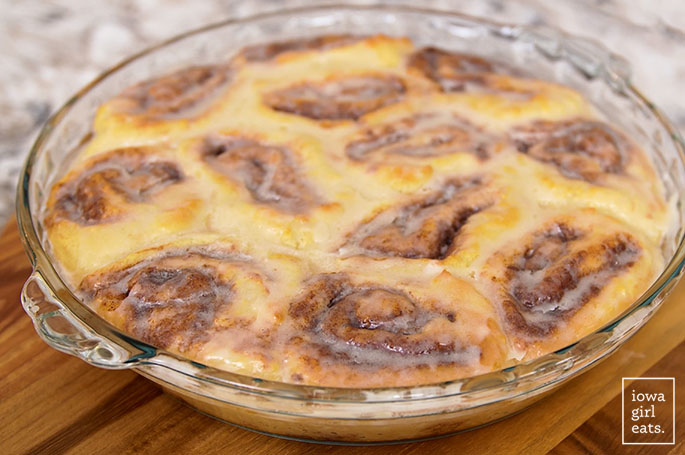
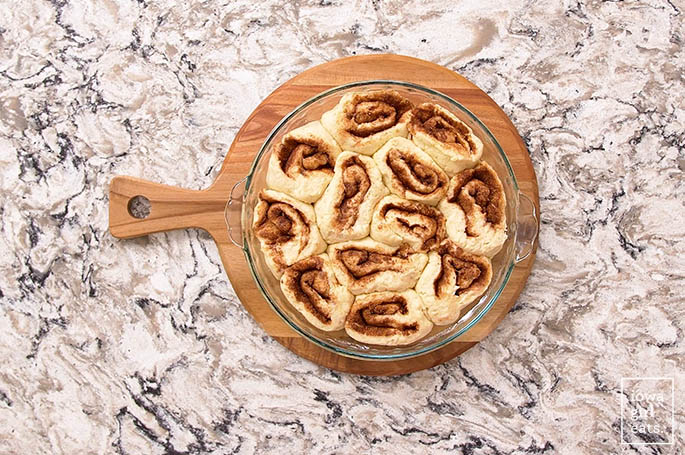
Transfer the rolls into a nonstick sprayed 9″ pie pan — I use the knife as a scraper/support for each slice.
Again, this dough is much softer then traditional cinnamon roll dough so be gentle. If the slices get misshapen, that’s ok. They’ll puff up during the second rise, plus they’ll be covered in icing anyway!
Can I make the rolls ahead of time?
You can prep these rolls up to a day ahead of time. Follow the directions up to this point then cover the pie pan with saran wrap and refrigerate. The following day, remove the saran wrap then place the rolls somewhere warm to rise — mine can sometimes take up to an hour and a half, though yours may take more or less time. Bake then frost according to recipe directions.
Place the pie pan in the same warm spot to let the cinnamon rolls rise a second time. Mine usually take 30-40 minutes.
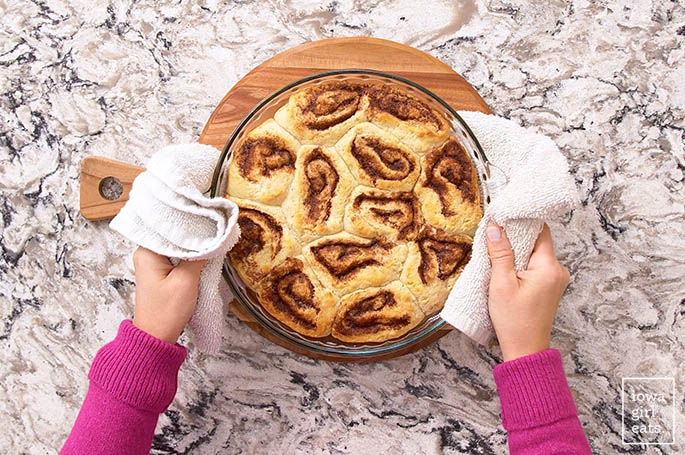
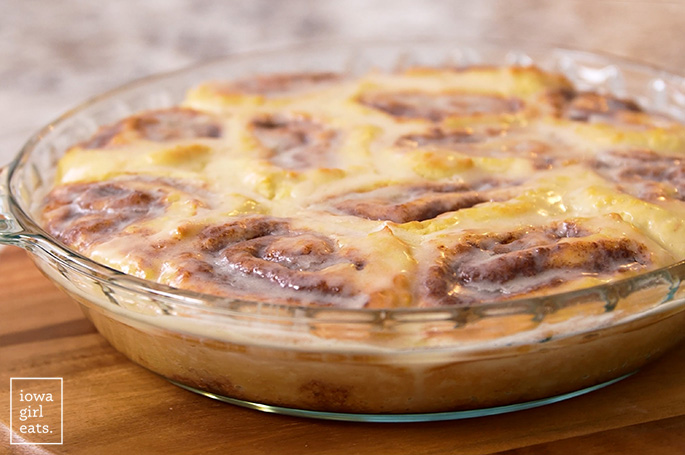
Step 5: Bake the Rolls.
Bake the rolls for 16-20 minutes at 350 degrees or until the tops are golden brown, rotating the pan 180 degrees halfway through.
Can you freeze the baked gluten free cinnamon rolls?
Yes! Cool the cinnamon rolls completely (do not ice) then cover with saran wrap and then a piece of foil and freeze. Thaw fully in the refrigerator on the counter then cover with foil only and bake for 10-12 minutes at 350 degrees or until warmed through. Ice according to recipe instructions.
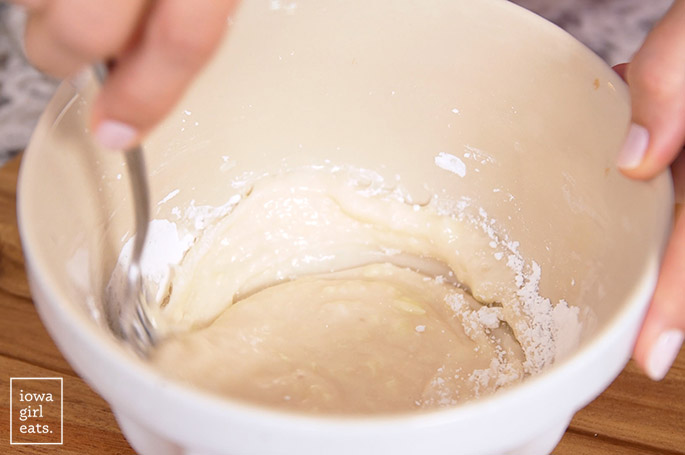
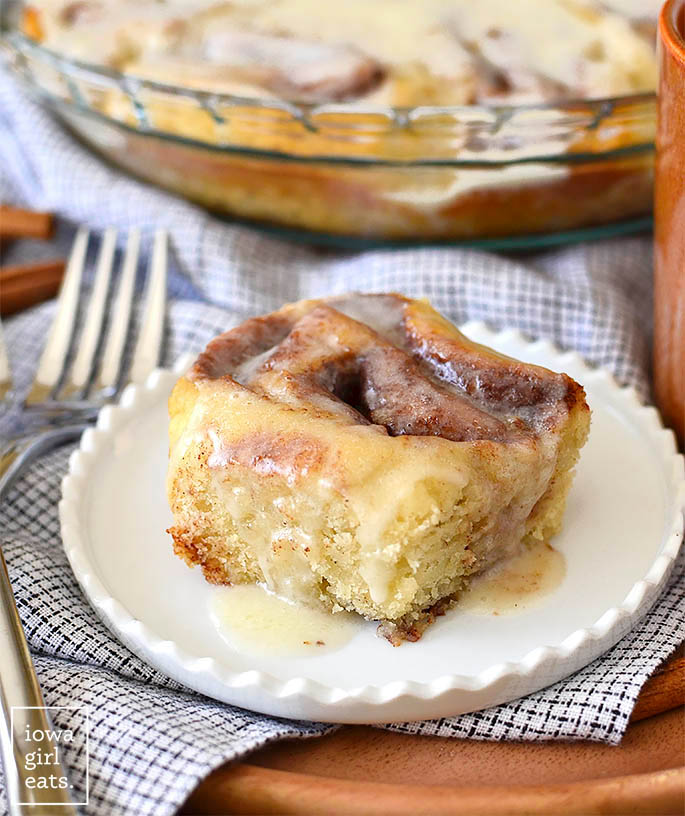
Step 6: Ice the Cinnamon Rolls.
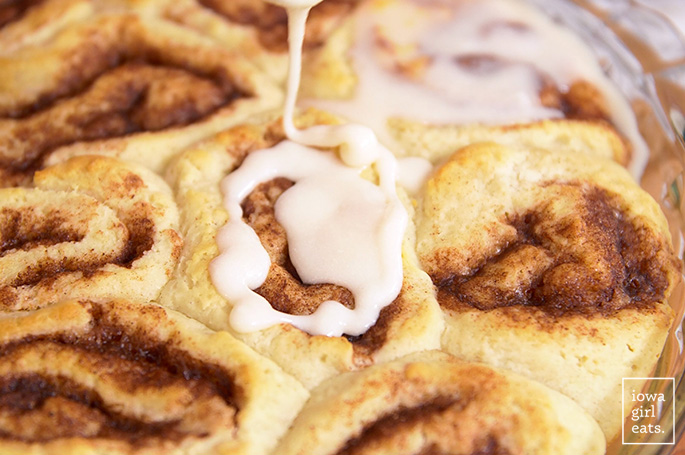
Let the cinnamon rolls cool for at least 15 minutes before slathering in icing, otherwise they’ll absorb it all. The icing is just room temperature butter or vegan butter stirred together with with powdered sugar, hot water, and vanilla extract.
I’ve tried topping these rolls with cream cheese frosting, and this simple butter + powdered sugar version knocks it out of the park. It tastes like Cinnabon — or at least, what I remember Cinnabon tasting like!
Can you reheat gluten free cinnamon rolls?
These rolls reheat fabulously. Just microwave a roll on a plate for 20 seconds or so.
I hope this recipe brings you and yours as much joy as it brings to my family and me. Enjoy every last sweet and cinnamon-y crumb!
More Gluten Free Brunch Favorites
- Gluten Free Quiche
- Gluten Free Banana Bread
- Billionaire Bacon
- Gluten Free Pancakes
- Gluten Free Zucchini Bread
- Gluten Free Pumpkin Bread
- Crockpot Breakfast Casserole
- Hash Brown Breakfast Casserole
- Baked Oatmeal Cups
Equipment
Ingredients
For the rolls:
- 1/4 cup butter or vegan butter
- 1 cup milk, see notes
- 1/3 cup + 1 Tablespoon sugar, divided
- 1 packet quick rise instant yeast
- 1 large egg, whisked
- 2-1/2 cups high quality gluten free baking flour blend with binder, Cup4Cup recommend, see notes
- 2 teaspoons baking powder
- 1/4 teaspoon salt
For the filling:
- 1/2 cup sugar
- 2 Tablespoons cinnamon
- 1/3 cup butter or vegan butter, extremely soft
For the icing:
- 2 Tablespoons butter or vegan butter
- 1 cup powdered sugar
- 1/2 teaspoon vanilla
- 1-1/2 Tablespoons hot water
Directions
- Read post in its entirety before making.
- Add butter to a large glass bowl then melt in the microwave. Add milk and 1 Tablespoon sugar then microwave for an additional 45-50 seconds, stir with a spatula, and take a temperature using an instant read thermometer – we’re looking for 110 degrees. Sprinkle in yeast then stir gently and let sit until foamy, 8 minutes. (If your mixture does not foam, likely your yeast was old and/or the temperature of the milk mixture was too cool or too warm.) Add whisked egg and remaining 1/3 cup sugar then stir gently to combine.
- Meanwhile, in another bowl add gluten-free flour blend, baking powder, and salt then stir with a fork to combine. Add to wet ingredients in two batches, stirring until flour is just incorporated (small lumps remaining are fine) before adding the next batch. Dough should be very soft but not overly sticky – kind of like sugar cookie dough. Cover with a tea towel then set somewhere warm to double in volume, 1 hour. I use my oven’s “bread proof” setting, though placing the pan on a heating pad set to warm, or placing in a warm sunny spot will also work. Your dough may not rise if it's not in a warm enough spot.
- Combine sugar and cinnamon from filling recipe in a small bowl then set aside. Spray a 9” pie plate with nonstick spray then set aside.
- Scrape the dough onto a large sheet of parchment paper that’s been lightly sprayed with nonstick spray then, with lightly oiled hands, spread dough into a 1/4” thick rectangle, roughly 10×14”. THE KEY TO SUCCESSFULLY SLICING THIS DOUGH IS TO NOT PRESS IT TOO THIN.
- Using your fingers, gently spread softened butter over the dough, leaving 1” clear on the bottom. Sprinkle the cinnamon sugar mixture evenly on top, avoiding the clear strip of dough then, using the parchment paper, gently roll the dough from the top down towards you. Continue to roll the dough into a log using the parchment paper instead of your hands until you reach the bottom. Lightly pinch the seams of the dough together then slice the log into quarters using a sharp knife in one slicing motion vs sawing at the dough. Wipe off knife in between cuts as necessary and/or dip knife in flour blend to prevent sticking. Slice each quarter into thirds for 12 slices total then arrange the slices in the prepared pie plate. Since the dough will be very soft, it helps to use the knife to re-slice and scrape each roll off the parchment paper and into the pan.
- Place rolls somewhere warm to rise until puffy, 30-40 minutes. Again, I use my oven’s “bread proof” setting. During the last 10 minutes of rising time, preheat oven to 350 degrees. Bake rolls for 16-20 minutes, or until golden brown on top, rotating the pan 180 degrees halfway through.
- Let rolls cool for 15 minutes then make the icing. (If you ice them while they’re too hot they’ll absorb all the icing.) Add ingredients for the icing in a bowl then whisk vigorously until smooth. Spoon icing on top of the rolls then serve. Rolls are best the day they’re made but leftovers can be stored in the refrigerator and microwaved for 20-25 seconds uncovered to warm back up.
Notes
- Be sure to read the post text for photos and tips!
- I highly recommend using a high quality gluten free baking flour blend such as Cup4Cup. I’ve successfully used Bob’s Red Mill Gluten-Free 1:1 Baking Flour in this recipe for years, though the dough is softer and not as easy to work. Whatever blend you use, be sure that it already contains a binder like xanthan gum.
- I have tested this recipe using whole milk, 2% milk, and unsweetened almond milk.
- Make sure your yeast AND baking powder are fresh and not expired, which will affect the successful rise of the rolls.
- The consistency of the cinnamon roll dough is like very soft play dough so don’t be surprised or discouraged when it doesn’t look or feel like traditional cinnamon roll dough.
- Don’t roll the dough too thin otherwise it will fall apart. This is the #1 thing to keep in mind to successfully get the rolls into the pan.
- Don’t panic if your rolls don’t slice up perfectly – they’ll rise and shape up nicely, plus they’ll eventually be covered in icing. Again, my biggest tip for successfully slicing the rolls is to make sure the dough isn’t rolled too thin.
- You may prepare the rolls a day ahead of time – prepare through step 6 then cover pie pan tightly with saran wrap and refrigerate. The following day, remove saran wrap and place rolls somewhere warm to rise – mine take 1-1/2 hours though yours may take more or less time. Bake and frost according to recipe instructions.
Nutrition
Nutritional values are estimates only. Please read our full nutrition information disclaimer.


This recipe is amazing! My nephew is recently gf and loves cinnamon rolls. Tried this recipe and they were a hit! I made a regular batch and a batch of these and you couldn’t tell a difference. These might have even been better as they are a little lighter. Thank you for an amazing recipe!
THRILLED to hear it, Carrie!! Thank you so much for your feedback and recipe rating!
If it’s vegan, the egg wouldn’t work. What is the substitute for the egg? This looks incredible. We have vegan/gluten-free in our family, so this recipe looks appealing, and should taste appealing if it is what you say it is. Thank you.
Hi Sidna! I didn’t say these rolls were vegan. I said I make them dairy free by using vegan butter. I hope that clears things up!
Has anyone froze the leftovers and microwaved them to reheat?
Can you make these individual instead togather
Hi Patrick! Since the dough is so soft, the rolls hold each other up by being placed together in the pan.
Mind Blown on the suggestion to use a heating pad!! I had no idea. Can’t wait to try these. Thanks Kristin. Your directions look great and love all the little tips.
Please help! When mixing the recipe this morning, I realized I bought Bob’s all purpose baking flour instead of the 1:1 baking flour. It is not dough consistency but more like muffin batter. Is there any thing I can do or do I need to start over?
Hi Andrea! Shoot – I haven’t tried with that particular flour so I can’t say for sure. I’m sorry I can’t be of more help!
These were awesome!!! To accommodate my egg and dairy allergic family (which also makes the rolls vegan), I used powdered egg replacer (whipped in the blender), vegan butter and coconut milk. I used my own flour mixture (1 part each of sorghum, brown rice, white rice, and tapioca flours) as xanthan gum doesn’t play well with egg replacer IME, and added a tablespoon of psyllium husk powder to replace the xanthan gum that’s in the Bob’s cup for cup. None of my ingredient swaps changed the way the recipe would behave, just made it allergen friendly-my cinnamon roll loving husband was THRILLED!
Ahh, I am SO glad to hear it, Shawnette!!! Thank you so much for sharing!
The recipe calls for white sugar in the filling but the picture shows brown sugar?
The white sugar is in the dough. Brown sugar is in the filling.
Your recipe does not specify brown sugar. I made mine with white sugar in the filling. Fingers crossed. Brown would make more sense.
It’s white sugar.
It appears brown in the picture because it’s white sugar blended well with 2 Tbsp of cinnamon. That’s a lot of cinnamon so it appears brown!
What happened?!? I’m in my kitchen on the floor in tears because this didn’t work. My dough was too liquidy and i followed all the instructions so i tried t fix it and it only got worse its yellow and stupid looking and I’m this close to ending it all. I dont blame you i know my flaws im just very upset right now.
Oh noo, Sandra! I’m so sorry to hear that! Mistakes and mishaps in the kitchen happen to us ALL. Did you by chance use the Bob’s Red Mill Flour, or a different kind?
Sorry for the late reply. I had to go to therapy and take some time for my cooking confidence to be rebuilt. I found a nice support group for people who are bad a cooking though and I’m doing much better. Will attempt again later for my baby daddy and I’s gender reveal party later. Thank you for your support during this difficult time!
Sorry for the late reply. I had to go to therapy and take some time for my cooking confidence to rebuild. I found a nice support group though and I am doing much better. Will attempt again later for my baby daddy and I’s gender reveal party. Thank you for your support during this difficult time!
do i use white sugar or brown sugar?
Ah, I wish I had seen this comment earlier. The recipe states “sugar” for the filling – it doesn’t mention brown sugar. I didn’t see this comment until already in the oven. Will see how the filling turns out.
Do you have the recipe with weights for the flour? I find that corrects for location / humidity issues.
Hi! I want to attempt these but I’m the only gluten free eater in my home. Have you tried freezing them after they’ve been baked? I saw in another comment they didn’t rise as well when frozen before they were baked. TIA
Hi Courtney! I haven’t tried freezing post baking (we never have any leftover!) but I think that could work!
Will this recipe work with an egg substitute?
Unfortunately I don’t think so! The tackiness from the egg is one of the few things holding this soft dough together.